> ## Documentation Index
> Fetch the complete documentation index at: https://api.xcompute.us/llms.txt
> Use this file to discover all available pages before exploring further.
# Codex 的安装与配置
> Codex 是 OpenAI 推出的 AI 编程智能体(Coding Agent),能听懂人话,按指令行事,自动修改代码。本教程将指导你在不同平台上安装和配置 Codex。
### 与 ChatGPT 的核心区别
| 对比维度 | ChatGPT(网页版) | Codex CLI |
| ----- | ------------- | ----------- |
| 运行环境 | 浏览器 | 本地终端 |
| 文件系统 | 无法直接访问 | 可读写本地文件 |
| 命令执行 | 不能执行 shell 命令 | 可在沙箱中执行命令 |
| 代码上下文 | 手动粘贴 | 自动读取项目文件 |
| 开源 | 否 | 完全开源 |
| 模型灵活度 | 固定前端 | 可自定义 API 端点 |
## 工具简介
Codex 的用处分为两大类:
**程序员用:**
* 用看得懂的中文回答他做了什么
* 按你的需求操控电脑进行数据修改与代码编写
* 支持多任务操作,可开多个窗口一起工作
**非程序员用:**
* 整理桌面文件排列整齐
* 辅助完成每日工作,减轻工作压力
* 需要成品时,叫 Codex 帮你生成一个,简单快捷
***
## 前置准备
### Node.js 22+
Codex CLI 要求 Node.js 22 或更高版本,这是硬性要求。
```bash theme={null}
node --version # 应输出 v22.x.x
```
如未安装,推荐使用 nvm:
```bash theme={null}
curl -o- https://raw.githubusercontent.com/nvm-sh/nvm/v0.40.3/install.sh | bash
source ~/.bashrc
nvm install 22
nvm use 22
```
详细环境准备请参考 [环境准备:NVM、Node.js 22 和 npm](/node-setup)。
### 支持的操作系统
| 操作系统 | 支持情况 | 备注 |
| ------------- | ------ | ---------------- |
| macOS 12+ | 完全支持 | 推荐 |
| Ubuntu 20.04+ | 完全支持 | 推荐 |
| Debian 11+ | 完全支持 | |
| Windows 10/11 | 需 WSL2 | 原生 Windows 不支持沙箱 |
### 网络环境
* 能够访问 `https://xcompute.us`(主入口)
* 能够访问 `https://intl.dualseason.com`(加速入口)
```bash theme={null}
curl -I https://xcompute.us/v1/models \
-H "Authorization: Bearer sk-your-key"
```
### 获取 Xcompute API Key
如果你已经拥有 API Key,可以直接跳到安装步骤。如尚未获取,可参考 [Xcompute API 文档](/file#快速开始) 创建密钥。
| 使用场景 | 建议渠道 |
| --------------- | -------------- |
| GPT 模型 | GPT 福利渠道 0.9 折 |
| Claude 日常使用 | Kiro 渠道 1.8 折 |
| Claude 高质量或蒸馏需求 | 官 Key 渠道 4.9 折 |
***
## 安装 Codex
### CLI 版(程序员用)
#### Mac 系统
**方式一:npm 安装**(如果没有 npm,先安装 Node.js)
Node.js 下载地址(需 VPN):[https://nodejs.org/en](https://nodejs.org/en)
```bash theme={null}
npm install -g @openai/codex
```
**方式二:Homebrew 安装**
```bash theme={null}
brew -v
brew install --cask codex
```
#### Windows 系统
以管理员身份运行 PowerShell,安装 WSL:
```powershell theme={null}
wsl --install -d Ubuntu-24.04
```
重启进入 WSL 后,安装 Node.js 和 Codex:
```bash theme={null}
curl -o- https://raw.githubusercontent.com/nvm-sh/nvm/v0.39.7/install.sh | bash
source ~/.bashrc
nvm install 22
npm install -g @openai/codex
```
#### Linux 系统
**方式一:npm 安装**
```bash theme={null}
npm install -g @openai/codex
```
**方式二:二进制离线安装**
```bash theme={null}
# x86_64
curl -L https://github.com/openai/codex/releases/download/rust-v0.131.0/codex-x86_64-unknown-linux-musl.tar.gz | tar -xz
sudo mv codex /usr/local/bin/
# ARM64(将文件名中的 x86_64 替换为 aarch64 即可)
```
#### 验证安装
```bash theme={null}
codex --version
```
如果弹出版本号(如 `0.xxx.0`)即安装成功。
首次运行 `codex` 会有两个选项:
1. **ChatGPT 账号** — 推荐新手,有免费额度
2. **OpenAI API Key** — 适合开发者,接入 Xcompute API Key
如果未配置 API Key 会提示认证错误,请先完成上方配置章节再测试。
```bash theme={null}
# 一行命令快速验证配置
OPENAI_BASE_URL="https://xcompute.us/v1" \
OPENAI_API_KEY="sk-xxx" \
codex "输出 hello world"
```
### 桌面版(非程序员用)
打开即用,无需命令行操作。
| 系统 | 下载方式 |
| ------------- | ----------------------------- |
| Mac / Windows | 官网下载(需 VPN,Windows 推荐 Win10+) |
| Linux | 暂不支持桌面端 |
下载地址:[https://chatgpt.com/zh-Hans-CN/download/](https://chatgpt.com/zh-Hans-CN/download/)
打开桌面版后,会看到登录界面:
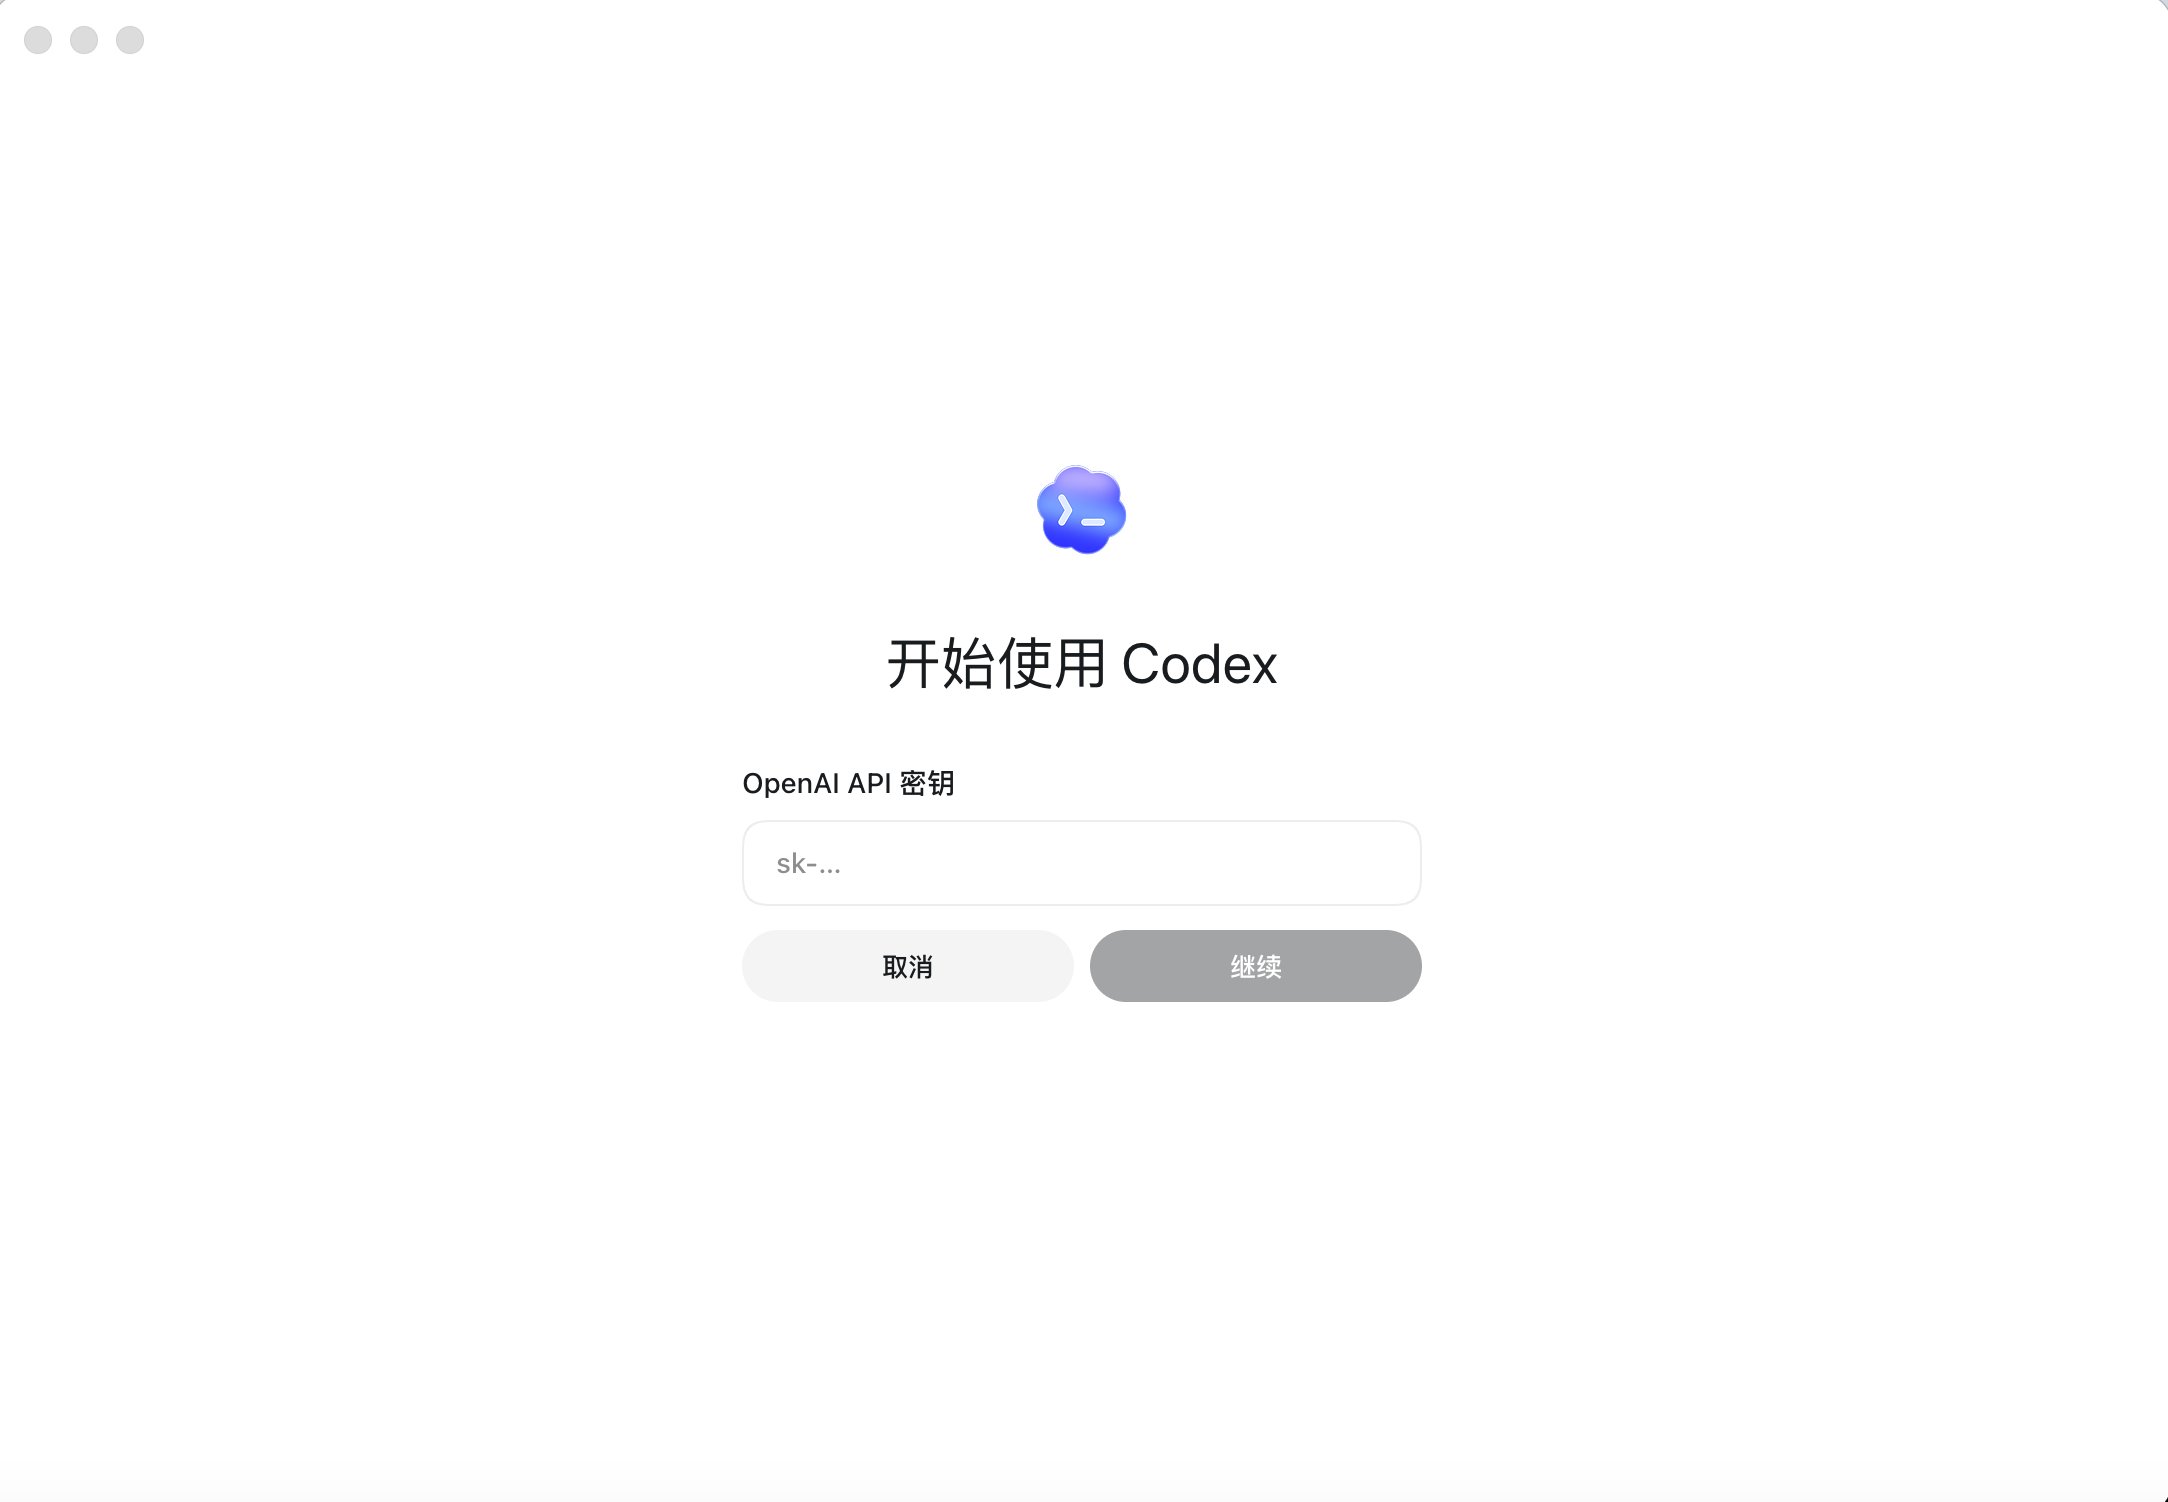 按界面提示输入 API Key 即可登录使用。
***
## 配置 Codex 对接 Xcompute
Codex 默认连 OpenAI 官方 API。要接到 Xcompute,需要修改 API 地址和 Key。
### Xcompute API 概览
| 项目 | 信息 |
| ------------------- | ------------------------------------------------------ |
| Base URL(OpenAI 协议) | `https://xcompute.us/v1` |
| 加速入口 | `https://intl.dualseason.com/v1` |
| 渠道分组 | GPT 福利 0.9 折 / GPT 渠道 1.5 折 / Kiro 1.8 折 / 官 Key 4.9 折 |
| 模型范围 | GPT 系列、Claude 系列、Gemini、国产模型 |
### 方法一:环境变量(推荐新手)
```bash theme={null}
export OPENAI_BASE_URL="https://xcompute.us/v1"
export OPENAI_API_KEY="sk-你的API密钥"
```
Base URL 必须包含 `/v1` 后缀!正确:`https://xcompute.us/v1`,错误:`https://xcompute.us`
永久写入配置:
```bash theme={null}
echo 'export OPENAI_BASE_URL="https://xcompute.us/v1"' >> ~/.zshrc
echo 'export OPENAI_API_KEY="sk-你的API密钥"' >> ~/.zshrc
source ~/.zshrc
```
一行命令验证:
```bash theme={null}
OPENAI_BASE_URL="https://xcompute.us/v1" OPENAI_API_KEY="sk-xxx" codex "输出 hello world"
```
### 方法二:配置文件(config.toml)
创建 `~/.codex/config.toml`:
```toml theme={null}
model = "gpt-5.6-sol"
[model_providers.xcompute]
name = "Xcompute"
base_url = "https://xcompute.us/v1"
env_key = "OPENAI_API_KEY"
provider = "xcompute"
```
`env_key` 指向的是环境变量名称,你仍需设置 `OPENAI_API_KEY` 环境变量。
**配置字段详解:**
| 字段 | 类型 | 必填 | 说明 |
| --------------------------------- | ------ | -- | ------------------------------------------ |
| `model` | string | 否 | 默认使用的模型名称 |
| `provider` | string | 否 | 默认使用的模型提供者标识 |
| `model_providers..name` | string | 是 | 提供者显示名称 |
| `model_providers..base_url` | string | 是 | API 地址(必须含 `/v1`) |
| `model_providers..env_key` | string | 是 | 存储 API Key 的环境变量名 |
| `model_providers..wire_api` | string | 否 | 协议类型,`"chat"`(中转站用)或 `"responses"`(官方默认) |
| `approval_mode` | string | 否 | 沙箱模式:`suggest` / `auto-edit` / `full-auto` |
多提供者配置(方便切换):
```toml theme={null}
model = "gpt-5.6-sol"
[model_providers.xcompute]
name = "Xcompute 主站"
base_url = "https://xcompute.us/v1"
env_key = "OPENAI_API_KEY"
[model_providers.xcompute-accel]
name = "Xcompute 加速"
base_url = "https://intl.dualseason.com/v1"
env_key = "OPENAI_API_KEY"
provider = "xcompute"
```
### 方法三:加速入口
```bash theme={null}
export OPENAI_BASE_URL="https://intl.dualseason.com/v1"
export OPENAI_API_KEY="sk-你的API密钥"
```
| 对比项 | 主入口 | 加速入口 |
| ------- | ------------------------ | -------------------------------- |
| URL | `https://xcompute.us/v1` | `https://intl.dualseason.com/v1` |
| 速度 | 标准 | 优化(国内更快) |
| API Key | 通用 | 通用 |
| 推荐场景 | 海外服务器 | 国内网络环境 |
### 方法四:CC Switch(桌面端)
通过 **CC Switch** 可以快速配置可视化供应商信息。
按界面提示输入 API Key 即可登录使用。
***
## 配置 Codex 对接 Xcompute
Codex 默认连 OpenAI 官方 API。要接到 Xcompute,需要修改 API 地址和 Key。
### Xcompute API 概览
| 项目 | 信息 |
| ------------------- | ------------------------------------------------------ |
| Base URL(OpenAI 协议) | `https://xcompute.us/v1` |
| 加速入口 | `https://intl.dualseason.com/v1` |
| 渠道分组 | GPT 福利 0.9 折 / GPT 渠道 1.5 折 / Kiro 1.8 折 / 官 Key 4.9 折 |
| 模型范围 | GPT 系列、Claude 系列、Gemini、国产模型 |
### 方法一:环境变量(推荐新手)
```bash theme={null}
export OPENAI_BASE_URL="https://xcompute.us/v1"
export OPENAI_API_KEY="sk-你的API密钥"
```
Base URL 必须包含 `/v1` 后缀!正确:`https://xcompute.us/v1`,错误:`https://xcompute.us`
永久写入配置:
```bash theme={null}
echo 'export OPENAI_BASE_URL="https://xcompute.us/v1"' >> ~/.zshrc
echo 'export OPENAI_API_KEY="sk-你的API密钥"' >> ~/.zshrc
source ~/.zshrc
```
一行命令验证:
```bash theme={null}
OPENAI_BASE_URL="https://xcompute.us/v1" OPENAI_API_KEY="sk-xxx" codex "输出 hello world"
```
### 方法二:配置文件(config.toml)
创建 `~/.codex/config.toml`:
```toml theme={null}
model = "gpt-5.6-sol"
[model_providers.xcompute]
name = "Xcompute"
base_url = "https://xcompute.us/v1"
env_key = "OPENAI_API_KEY"
provider = "xcompute"
```
`env_key` 指向的是环境变量名称,你仍需设置 `OPENAI_API_KEY` 环境变量。
**配置字段详解:**
| 字段 | 类型 | 必填 | 说明 |
| --------------------------------- | ------ | -- | ------------------------------------------ |
| `model` | string | 否 | 默认使用的模型名称 |
| `provider` | string | 否 | 默认使用的模型提供者标识 |
| `model_providers..name` | string | 是 | 提供者显示名称 |
| `model_providers..base_url` | string | 是 | API 地址(必须含 `/v1`) |
| `model_providers..env_key` | string | 是 | 存储 API Key 的环境变量名 |
| `model_providers..wire_api` | string | 否 | 协议类型,`"chat"`(中转站用)或 `"responses"`(官方默认) |
| `approval_mode` | string | 否 | 沙箱模式:`suggest` / `auto-edit` / `full-auto` |
多提供者配置(方便切换):
```toml theme={null}
model = "gpt-5.6-sol"
[model_providers.xcompute]
name = "Xcompute 主站"
base_url = "https://xcompute.us/v1"
env_key = "OPENAI_API_KEY"
[model_providers.xcompute-accel]
name = "Xcompute 加速"
base_url = "https://intl.dualseason.com/v1"
env_key = "OPENAI_API_KEY"
provider = "xcompute"
```
### 方法三:加速入口
```bash theme={null}
export OPENAI_BASE_URL="https://intl.dualseason.com/v1"
export OPENAI_API_KEY="sk-你的API密钥"
```
| 对比项 | 主入口 | 加速入口 |
| ------- | ------------------------ | -------------------------------- |
| URL | `https://xcompute.us/v1` | `https://intl.dualseason.com/v1` |
| 速度 | 标准 | 优化(国内更快) |
| API Key | 通用 | 通用 |
| 推荐场景 | 海外服务器 | 国内网络环境 |
### 方法四:CC Switch(桌面端)
通过 **CC Switch** 可以快速配置可视化供应商信息。
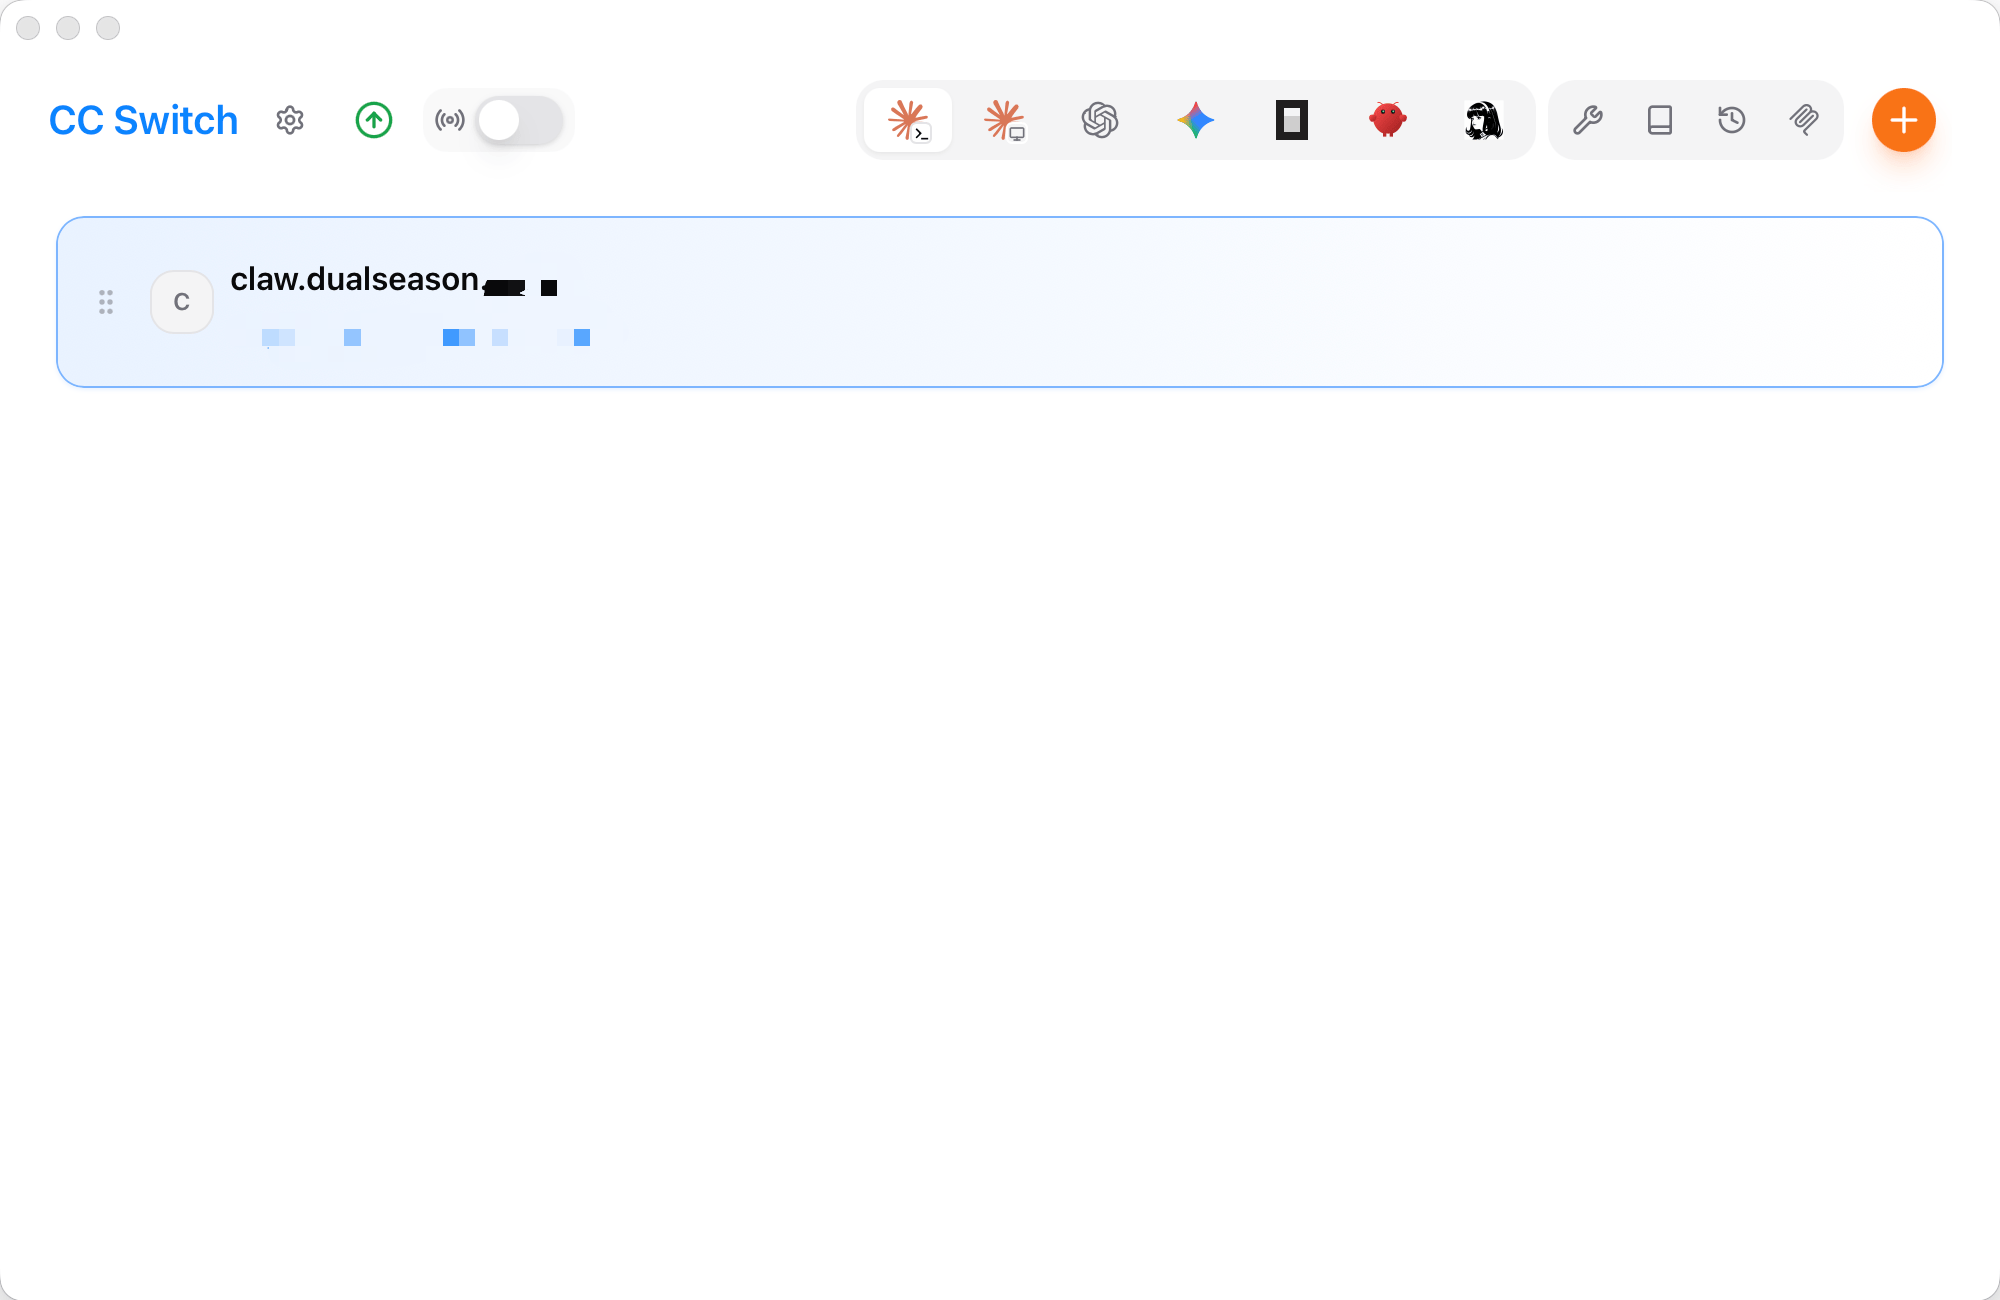 核心配置项:
| 字段 | 说明 |
| ----------- | ------------------------------------------------------ |
| **供应商名称** | 可随意填写 |
| **API Key** | 以 `sk-` 开头的密钥 |
| **请求地址** | `https://xcompute.us/v1`(国内用 `intl.dualseason.com/v1`) |
详细的 CC Switch 配置步骤请参考 [CC Switch 对接 Xcompute API 教程](/cc-switch)。
### 模型选择
#### 可用模型一览
| 模型 | 模型 ID | 渠道 | 上下文 | 特点 |
| ------------- | --------------- | ------------ | --- | -------- |
| GPT 5.6 Sol | `gpt-5.6-sol` | GPT 福利 0.9 折 | 1M | 综合能力最强 |
| GPT 5.6 Terra | `gpt-5.6-terra` | default | 1M | 性价比之选 |
| GPT 5.6 Luna | `gpt-5.6-luna` | GPT 渠道 1.5 折 | 1M | 速度最快、最便宜 |
| GPT 5.5 | `gpt-5.5` | GPT 福利 0.9 折 | 1M | 通用任务 |
| GPT 5.4 | `gpt-5.4` | GPT 福利 0.9 折 | 1M | 极低成本 |
#### 场景化推荐
| 场景 | 推荐模型 | 理由 |
| ------------ | --------------- | -------------- |
| 日常编码、bug 修复 | `gpt-5.6-terra` | 性价比之王,编码能力接近顶尖 |
| 复杂架构设计、多文件重构 | `gpt-5.6-sol` | 综合能力最强,上下文 1M |
| 简单补全、格式化 | `gpt-5.6-luna` | |
| 大段文档分析 | `gpt-5.6-sol` | 1M 超长上下文 |
#### 成本对比估算
以每天处理 10 个中等任务(每任务约 5K input + 2K output tokens)为例:
| 模型 | 日消耗估算 | 月消耗估算 | 性价比 |
| --------------- | -------- | ------- | ---- |
| `gpt-5.6-luna` | \~\$0.01 | \~\$0.3 | 极低成本 |
| `gpt-5.6-terra` | \~\$0.02 | \~\$0.6 | 经济实用 |
| `gpt-5.6-sol` | \~\$0.05 | \~\$1.5 | 能力强劲 |
使用 Xcompute 的 GPT 福利渠道(0.9 折),成本仅为官方价格的不到十分之一。
```bash theme={null}
# 通过 --model 指定模型
codex --model gpt-5.6-sol "复杂架构设计任务"
codex --model gpt-5.6-terra "日常编码任务"
codex --model gpt-5.6-luna "简单快速任务"
```
## 高级配置
### 沙箱模式
Codex 提供三种沙箱模式控制 AI 对文件系统和命令的访问:
| 模式 | 命令 | 说明 |
| -------------- | -------------------------------- | ----------------- |
| suggest(最安全) | `codex --sandbox suggest "任务"` | AI 仅建议操作,需用户确认 |
| auto-edit(平衡) | `codex --sandbox auto-edit "任务"` | 文件编辑自动执行,命令仍需确认 |
| full-auto(最高效) | `codex --sandbox full-auto "任务"` | 所有操作自动执行,需在隔离环境使用 |
### 代理设置
```bash theme={null}
export HTTP_PROXY="http://127.0.0.1:7890"
export HTTPS_PROXY="http://127.0.0.1:7890"
```
或在 `config.toml` 中:
```toml theme={null}
[proxy]
url = "http://127.0.0.1:7890"
```
### MCP 服务器扩展
```toml theme={null}
[mcp_servers.github]
command = "npx"
args = ["-y", "@modelcontextprotocol/server-github"]
env = { GITHUB_TOKEN = "ghp_xxx" }
```
### 完整配置示例
以下是一份生产级 `~/.codex/config.toml` 供参考:
```toml theme={null}
# 默认模型
model = "gpt-5.6-sol"
# 默认沙箱模式
approval_mode = "auto-edit"
# Xcompute 主站
[model_providers.xcompute]
name = "Xcompute"
base_url = "https://xcompute.us/v1"
env_key = "OPENAI_API_KEY"
# Xcompute 加速站
[model_providers.xcompute-fast]
name = "Xcompute Fast"
base_url = "https://intl.dualseason.com/v1"
env_key = "OPENAI_API_KEY"
# 默认提供者
provider = "xcompute"
```
### 自定义指令
```bash theme={null}
# 全局指令
echo "始终使用 TypeScript,遵循 ESLint 推荐的代码风格。" > ~/.codex/instructions.md
# 项目级指令(优先级更高)
echo "本项目使用 Python 3.12 + FastAPI。" > .codex/instructions.md
```
## 实战示例
创建 Express.js 项目:
```bash theme={null}
codex --model gpt-5.6-sol "在当前目录创建一个 Express.js REST API 项目,包含用户 CRUD,使用 SQLite,包含错误处理和输入验证"
```
代码审查:
```bash theme={null}
codex --model gpt-5.6-sol "审查 src/ 目录下的所有代码,找出潜在的性能问题和安全漏洞"
```
编写测试:
```bash theme={null}
codex --model gpt-5.6-terra "为 src/utils/ 下的工具函数编写完整的单元测试,使用 Jest 框架"
```
查看 Token 消耗:
Codex 会在任务完成后显示 token 使用统计:
```text theme={null}
✅ Task completed
─────────────────────────────
Tokens used:
Prompt: 3,245 tokens
Completion: 1,892 tokens
Total: 5,137 tokens
─────────────────────────────
Cost estimate: $0.0032 (gpt-5.6-terra)
```
通过观察 token 消耗,你可以优化指令措辞来减少不必要的开销。
### 切换模型对比效果
不同模型对同一任务的输出质量和速度差异明显:
```bash theme={null}
# 用 gpt-5.6-luna 完成简单任务(速度最快)
time codex --model gpt-5.6-luna "写一个冒泡排序算法"
# 响应快,成本低
# 用 gpt-5.6-terra 完成同样任务(日常推荐)
time codex --model gpt-5.6-terra "写一个冒泡排序算法"
# 用 gpt-5.6-sol 完成同样任务(最详细)
time codex --model gpt-5.6-sol "写一个冒泡排序算法"
# 可能更详细,但成本更高
```
***
## 测试连接
配置完成后,启动 Codex 并发送一条测试消息:
```text theme={null}
你好,请用一句话介绍你自己
```
能够正常收到回复即表示配置成功。
如果连接失败,可以用 curl 排查:
```bash theme={null}
curl https://xcompute.us/v1/models \
-H "Authorization: Bearer YOUR_API_KEY"
```
***
## 常见问题
### 401 认证错误
```text theme={null}
Error: 401 Unauthorized / Invalid API key provided
```
排查步骤:
```bash theme={null}
# 1. 确认 API Key 已设置
echo $OPENAI_API_KEY
# 2. 确认 Base URL 包含 /v1
echo $OPENAI_BASE_URL # 正确:https://xcompute.us/v1 错误:https://xcompute.us
# 3. 直接测试连通性
curl -s https://xcompute.us/v1/models \
-H "Authorization: Bearer $OPENAI_API_KEY" | head -c 200
```
Base URL 缺少 `/v1` 后缀是最常见的配置错误。
### 模型不存在
```text theme={null}
Error: 404 The model 'xxx' does not exist
```
```bash theme={null}
# 查看可用模型列表
curl -s https://xcompute.us/v1/models \
-H "Authorization: Bearer $OPENAI_API_KEY" | python3 -m json.tool
# 确认拼写:gpt-5.6-sol(正确)、GPT-5.6-Sol(大小写错误)、gpt5.6sol(缺少短横线)
```
### 连接超时
```text theme={null}
Error: ETIMEDOUT - Connection timed out
```
```bash theme={null}
# 切换到加速入口
export OPENAI_BASE_URL="https://intl.dualseason.com/v1"
# 或配置代理
export HTTPS_PROXY="http://127.0.0.1:7890"
# 测试网络
curl -v --connect-timeout 5 https://xcompute.us/v1/models
```
### 沙箱初始化失败
```text theme={null}
Error: Sandbox initialization failed / Docker is not running
```
```bash theme={null}
# 1. 确认 Docker 在运行
docker info
# 2. 确认当前用户在 docker 组中
groups | grep docker
# 3. WSL2 用户:确保 Docker Desktop 的 WSL2 集成已启用
# Docker Desktop → Settings → Resources → WSL Integration
# 4. 临时跳过沙箱测试
codex --sandbox none "你的任务"
```
### 找不到 config.toml?
先执行一次 `codex`,退出后再去用户目录找。
* Linux / macOS:`~/.codex`
* Windows:`C:\Users\你的用户名\.codex`
### 桌面版无法登录?
确保已开启科学上网(VPN),并确认账号或 API Key 有效。
### 配置后 Codex 仍走官方?
检查 `config.toml` 中的 `base_url` 是否正确指向 Xcompute 地址(必须有 `/v1`)。
### 与官方 API 的差异
| 对比项 | 官方 OpenAI | Xcompute |
| -------- | --------------------------- | ------------------------ |
| Base URL | `https://api.openai.com/v1` | `https://xcompute.us/v1` |
| 模型版本 | 最新 | 可能存在数小时延迟 |
| 响应速度 | 取决于官方服务器 | 可选加速入口 |
| 速率限制 | 官方限制 | 取决于渠道配置 |
| 价格 | 官方定价 | 折扣价(最低 0.9 折) |
| 计费 | 官方账单 | Xcompute 余额 |
### 其他常见错误
**ECONNREFUSED:**
```bash theme={null}
# 检查网络设置和代理配置
env | grep -i proxy
```
**rate limit exceeded:**
```bash theme={null}
# 等待一段时间后重试,或降低请求频率
# Xcompute 不同渠道有不同的速率限制
```
**insufficient balance:**
```text theme={null}
Error: insufficient balance
```
```bash theme={null}
# 登录 Xcompute 平台查看余额并充值
# 建议选择 GPT 福利渠道以降低成本
```
## 配置速查
```bash theme={null}
# 环境变量
export OPENAI_BASE_URL="https://xcompute.us/v1"
export OPENAI_API_KEY="sk-xxx"
# 基本使用
codex "你的任务描述"
codex --model gpt-5.6-sol "复杂架构设计"
codex --model gpt-5.6-terra "日常编码任务"
codex --model gpt-5.6-luna "简单快速任务"
# 沙箱模式
codex --sandbox suggest "任务" # 最安全 - AI 仅建议
codex --sandbox auto-edit "任务" # 平衡 - 文件自动编辑,命令需确认
codex --sandbox full-auto "任务" # 最高效 - 全部自动执行
# 加速入口
export OPENAI_BASE_URL="https://intl.dualseason.com/v1"
# 验证 API 连通性
curl -s $OPENAI_BASE_URL/models -H "Authorization: Bearer $OPENAI_API_KEY" | head -c 200
```
**快速命令速查:**
| 命令 | 说明 |
| ----------------------------- | -------- |
| `codex --version` | 验证安装 |
| `codex "任务"` | 直接运行任务 |
| `codex --model xxx "任务"` | 指定模型运行 |
| `codex --sandbox xxx "任务"` | 指定沙箱模式 |
| `codex --help` | 查看完整帮助 |
| `npm update -g @openai/codex` | 升级 Codex |
### 配置路径
```text theme={null}
~/.codex/config.toml # 全局配置文件
~/.codex/instructions.md # 全局自定义指令
/.codex/instructions.md # 项目级自定义指令
```
***
## 进阶:wire\_api 详解
对接第三方 API 时,`config.toml` 中的 `wire_api` 是最容易配错的字段:
| 值 | 对应接口 | 说明 |
| ------------- | ---------------------------------- | ---------------------------- |
| `"chat"` | `POST {base_url}/chat/completions` | 标准 OpenAI Chat 协议,大多数中转站使用 |
| `"responses"` | `POST {base_url}/responses` | OpenAI 新版 Responses API,官方默认 |
对接 Xcompute 等中转站时,通常使用 `wire_api = "chat"`。
## 进阶:多 Profile 配置
在 `config.toml` 中配置多个 Profile,修改 `profile` 字段即可快速切换模型:
```toml theme={null}
profile = "gpt5-xcompute"
[profiles.gpt5-xcompute]
model = "gpt-5.6-sol"
model_provider = "xcompute"
model_reasoning_effort = "high"
[profiles.deepseek]
model = "deepseek-v3.2"
model_provider = "xcompute-cn"
model_reasoning_effort = "medium"
[model_providers.xcompute]
name = "Xcompute API"
base_url = "https://xcompute.us/v1"
env_key = "OPENAI_API_KEY"
wire_api = "chat"
```
## 进阶:AGENTS.md 项目记忆
在项目根目录创建 `AGENTS.md`,为 Codex 提供持久化上下文:
```markdown theme={null}
# 项目规范
- 使用 TypeScript + React 开发
- 所有输出使用中文
- 测试框架使用 Jest
```
在 Codex 对话中使用 `/init` 可自动生成此文件。
## 成本控制建议
| 策略 | 说明 |
| ------------------- | ------------------------------- |
| 轻量任务用 gpt-5.6-luna | GPT 渠道 1.5 折,\$0.09/\$0.54 极低成本 |
| 日常编码用 gpt-5.6-terra | default,\$0.225/\$1.35 性价比之选 |
| 复杂任务用 gpt-5.6-sol | GPT 福利 0.9 折,\$0.45/\$2.70 高能力 |
| 简单任务用国产模型 | 5 折,成本低速度快 |
| 调低 reasoning effort | `medium` 或 `low` 减少 Token |
| 及时退出会话 | 避免空闲隐性消耗 |
***
## 相关资源
* **Codex 官方文档**:[https://platform.openai.com/codex](https://platform.openai.com/codex)
* **CC Switch 配置教程**:[https://api.xcompute.us/cc-switch](/cc-switch)
* **Xcompute API 文档**:[https://api.xcompute.us](/file)
* **Node.js 下载**:[https://nodejs.org/en](https://nodejs.org/en)
## 更多教程
* [CC Switch 对接 Xcompute API 教程](/cc-switch)
* [Codex++ 对接 Xcompute API 教程](/codex-plus-plus)
* [CodexHub 对接 Xcompute API 教程](/codexhub)
* [Codex 破甲指南](/codex-jailbreak)
* [移动端使用 Claude、Codex — Kelivo](/kelivo)
***
*最后更新:2026-07-13*
> 本内容由 Coze AI 生成,请遵循相关法律法规及《人工智能生成合成内容标识办法》使用与传播。
核心配置项:
| 字段 | 说明 |
| ----------- | ------------------------------------------------------ |
| **供应商名称** | 可随意填写 |
| **API Key** | 以 `sk-` 开头的密钥 |
| **请求地址** | `https://xcompute.us/v1`(国内用 `intl.dualseason.com/v1`) |
详细的 CC Switch 配置步骤请参考 [CC Switch 对接 Xcompute API 教程](/cc-switch)。
### 模型选择
#### 可用模型一览
| 模型 | 模型 ID | 渠道 | 上下文 | 特点 |
| ------------- | --------------- | ------------ | --- | -------- |
| GPT 5.6 Sol | `gpt-5.6-sol` | GPT 福利 0.9 折 | 1M | 综合能力最强 |
| GPT 5.6 Terra | `gpt-5.6-terra` | default | 1M | 性价比之选 |
| GPT 5.6 Luna | `gpt-5.6-luna` | GPT 渠道 1.5 折 | 1M | 速度最快、最便宜 |
| GPT 5.5 | `gpt-5.5` | GPT 福利 0.9 折 | 1M | 通用任务 |
| GPT 5.4 | `gpt-5.4` | GPT 福利 0.9 折 | 1M | 极低成本 |
#### 场景化推荐
| 场景 | 推荐模型 | 理由 |
| ------------ | --------------- | -------------- |
| 日常编码、bug 修复 | `gpt-5.6-terra` | 性价比之王,编码能力接近顶尖 |
| 复杂架构设计、多文件重构 | `gpt-5.6-sol` | 综合能力最强,上下文 1M |
| 简单补全、格式化 | `gpt-5.6-luna` | |
| 大段文档分析 | `gpt-5.6-sol` | 1M 超长上下文 |
#### 成本对比估算
以每天处理 10 个中等任务(每任务约 5K input + 2K output tokens)为例:
| 模型 | 日消耗估算 | 月消耗估算 | 性价比 |
| --------------- | -------- | ------- | ---- |
| `gpt-5.6-luna` | \~\$0.01 | \~\$0.3 | 极低成本 |
| `gpt-5.6-terra` | \~\$0.02 | \~\$0.6 | 经济实用 |
| `gpt-5.6-sol` | \~\$0.05 | \~\$1.5 | 能力强劲 |
使用 Xcompute 的 GPT 福利渠道(0.9 折),成本仅为官方价格的不到十分之一。
```bash theme={null}
# 通过 --model 指定模型
codex --model gpt-5.6-sol "复杂架构设计任务"
codex --model gpt-5.6-terra "日常编码任务"
codex --model gpt-5.6-luna "简单快速任务"
```
## 高级配置
### 沙箱模式
Codex 提供三种沙箱模式控制 AI 对文件系统和命令的访问:
| 模式 | 命令 | 说明 |
| -------------- | -------------------------------- | ----------------- |
| suggest(最安全) | `codex --sandbox suggest "任务"` | AI 仅建议操作,需用户确认 |
| auto-edit(平衡) | `codex --sandbox auto-edit "任务"` | 文件编辑自动执行,命令仍需确认 |
| full-auto(最高效) | `codex --sandbox full-auto "任务"` | 所有操作自动执行,需在隔离环境使用 |
### 代理设置
```bash theme={null}
export HTTP_PROXY="http://127.0.0.1:7890"
export HTTPS_PROXY="http://127.0.0.1:7890"
```
或在 `config.toml` 中:
```toml theme={null}
[proxy]
url = "http://127.0.0.1:7890"
```
### MCP 服务器扩展
```toml theme={null}
[mcp_servers.github]
command = "npx"
args = ["-y", "@modelcontextprotocol/server-github"]
env = { GITHUB_TOKEN = "ghp_xxx" }
```
### 完整配置示例
以下是一份生产级 `~/.codex/config.toml` 供参考:
```toml theme={null}
# 默认模型
model = "gpt-5.6-sol"
# 默认沙箱模式
approval_mode = "auto-edit"
# Xcompute 主站
[model_providers.xcompute]
name = "Xcompute"
base_url = "https://xcompute.us/v1"
env_key = "OPENAI_API_KEY"
# Xcompute 加速站
[model_providers.xcompute-fast]
name = "Xcompute Fast"
base_url = "https://intl.dualseason.com/v1"
env_key = "OPENAI_API_KEY"
# 默认提供者
provider = "xcompute"
```
### 自定义指令
```bash theme={null}
# 全局指令
echo "始终使用 TypeScript,遵循 ESLint 推荐的代码风格。" > ~/.codex/instructions.md
# 项目级指令(优先级更高)
echo "本项目使用 Python 3.12 + FastAPI。" > .codex/instructions.md
```
## 实战示例
创建 Express.js 项目:
```bash theme={null}
codex --model gpt-5.6-sol "在当前目录创建一个 Express.js REST API 项目,包含用户 CRUD,使用 SQLite,包含错误处理和输入验证"
```
代码审查:
```bash theme={null}
codex --model gpt-5.6-sol "审查 src/ 目录下的所有代码,找出潜在的性能问题和安全漏洞"
```
编写测试:
```bash theme={null}
codex --model gpt-5.6-terra "为 src/utils/ 下的工具函数编写完整的单元测试,使用 Jest 框架"
```
查看 Token 消耗:
Codex 会在任务完成后显示 token 使用统计:
```text theme={null}
✅ Task completed
─────────────────────────────
Tokens used:
Prompt: 3,245 tokens
Completion: 1,892 tokens
Total: 5,137 tokens
─────────────────────────────
Cost estimate: $0.0032 (gpt-5.6-terra)
```
通过观察 token 消耗,你可以优化指令措辞来减少不必要的开销。
### 切换模型对比效果
不同模型对同一任务的输出质量和速度差异明显:
```bash theme={null}
# 用 gpt-5.6-luna 完成简单任务(速度最快)
time codex --model gpt-5.6-luna "写一个冒泡排序算法"
# 响应快,成本低
# 用 gpt-5.6-terra 完成同样任务(日常推荐)
time codex --model gpt-5.6-terra "写一个冒泡排序算法"
# 用 gpt-5.6-sol 完成同样任务(最详细)
time codex --model gpt-5.6-sol "写一个冒泡排序算法"
# 可能更详细,但成本更高
```
***
## 测试连接
配置完成后,启动 Codex 并发送一条测试消息:
```text theme={null}
你好,请用一句话介绍你自己
```
能够正常收到回复即表示配置成功。
如果连接失败,可以用 curl 排查:
```bash theme={null}
curl https://xcompute.us/v1/models \
-H "Authorization: Bearer YOUR_API_KEY"
```
***
## 常见问题
### 401 认证错误
```text theme={null}
Error: 401 Unauthorized / Invalid API key provided
```
排查步骤:
```bash theme={null}
# 1. 确认 API Key 已设置
echo $OPENAI_API_KEY
# 2. 确认 Base URL 包含 /v1
echo $OPENAI_BASE_URL # 正确:https://xcompute.us/v1 错误:https://xcompute.us
# 3. 直接测试连通性
curl -s https://xcompute.us/v1/models \
-H "Authorization: Bearer $OPENAI_API_KEY" | head -c 200
```
Base URL 缺少 `/v1` 后缀是最常见的配置错误。
### 模型不存在
```text theme={null}
Error: 404 The model 'xxx' does not exist
```
```bash theme={null}
# 查看可用模型列表
curl -s https://xcompute.us/v1/models \
-H "Authorization: Bearer $OPENAI_API_KEY" | python3 -m json.tool
# 确认拼写:gpt-5.6-sol(正确)、GPT-5.6-Sol(大小写错误)、gpt5.6sol(缺少短横线)
```
### 连接超时
```text theme={null}
Error: ETIMEDOUT - Connection timed out
```
```bash theme={null}
# 切换到加速入口
export OPENAI_BASE_URL="https://intl.dualseason.com/v1"
# 或配置代理
export HTTPS_PROXY="http://127.0.0.1:7890"
# 测试网络
curl -v --connect-timeout 5 https://xcompute.us/v1/models
```
### 沙箱初始化失败
```text theme={null}
Error: Sandbox initialization failed / Docker is not running
```
```bash theme={null}
# 1. 确认 Docker 在运行
docker info
# 2. 确认当前用户在 docker 组中
groups | grep docker
# 3. WSL2 用户:确保 Docker Desktop 的 WSL2 集成已启用
# Docker Desktop → Settings → Resources → WSL Integration
# 4. 临时跳过沙箱测试
codex --sandbox none "你的任务"
```
### 找不到 config.toml?
先执行一次 `codex`,退出后再去用户目录找。
* Linux / macOS:`~/.codex`
* Windows:`C:\Users\你的用户名\.codex`
### 桌面版无法登录?
确保已开启科学上网(VPN),并确认账号或 API Key 有效。
### 配置后 Codex 仍走官方?
检查 `config.toml` 中的 `base_url` 是否正确指向 Xcompute 地址(必须有 `/v1`)。
### 与官方 API 的差异
| 对比项 | 官方 OpenAI | Xcompute |
| -------- | --------------------------- | ------------------------ |
| Base URL | `https://api.openai.com/v1` | `https://xcompute.us/v1` |
| 模型版本 | 最新 | 可能存在数小时延迟 |
| 响应速度 | 取决于官方服务器 | 可选加速入口 |
| 速率限制 | 官方限制 | 取决于渠道配置 |
| 价格 | 官方定价 | 折扣价(最低 0.9 折) |
| 计费 | 官方账单 | Xcompute 余额 |
### 其他常见错误
**ECONNREFUSED:**
```bash theme={null}
# 检查网络设置和代理配置
env | grep -i proxy
```
**rate limit exceeded:**
```bash theme={null}
# 等待一段时间后重试,或降低请求频率
# Xcompute 不同渠道有不同的速率限制
```
**insufficient balance:**
```text theme={null}
Error: insufficient balance
```
```bash theme={null}
# 登录 Xcompute 平台查看余额并充值
# 建议选择 GPT 福利渠道以降低成本
```
## 配置速查
```bash theme={null}
# 环境变量
export OPENAI_BASE_URL="https://xcompute.us/v1"
export OPENAI_API_KEY="sk-xxx"
# 基本使用
codex "你的任务描述"
codex --model gpt-5.6-sol "复杂架构设计"
codex --model gpt-5.6-terra "日常编码任务"
codex --model gpt-5.6-luna "简单快速任务"
# 沙箱模式
codex --sandbox suggest "任务" # 最安全 - AI 仅建议
codex --sandbox auto-edit "任务" # 平衡 - 文件自动编辑,命令需确认
codex --sandbox full-auto "任务" # 最高效 - 全部自动执行
# 加速入口
export OPENAI_BASE_URL="https://intl.dualseason.com/v1"
# 验证 API 连通性
curl -s $OPENAI_BASE_URL/models -H "Authorization: Bearer $OPENAI_API_KEY" | head -c 200
```
**快速命令速查:**
| 命令 | 说明 |
| ----------------------------- | -------- |
| `codex --version` | 验证安装 |
| `codex "任务"` | 直接运行任务 |
| `codex --model xxx "任务"` | 指定模型运行 |
| `codex --sandbox xxx "任务"` | 指定沙箱模式 |
| `codex --help` | 查看完整帮助 |
| `npm update -g @openai/codex` | 升级 Codex |
### 配置路径
```text theme={null}
~/.codex/config.toml # 全局配置文件
~/.codex/instructions.md # 全局自定义指令
/.codex/instructions.md # 项目级自定义指令
```
***
## 进阶:wire\_api 详解
对接第三方 API 时,`config.toml` 中的 `wire_api` 是最容易配错的字段:
| 值 | 对应接口 | 说明 |
| ------------- | ---------------------------------- | ---------------------------- |
| `"chat"` | `POST {base_url}/chat/completions` | 标准 OpenAI Chat 协议,大多数中转站使用 |
| `"responses"` | `POST {base_url}/responses` | OpenAI 新版 Responses API,官方默认 |
对接 Xcompute 等中转站时,通常使用 `wire_api = "chat"`。
## 进阶:多 Profile 配置
在 `config.toml` 中配置多个 Profile,修改 `profile` 字段即可快速切换模型:
```toml theme={null}
profile = "gpt5-xcompute"
[profiles.gpt5-xcompute]
model = "gpt-5.6-sol"
model_provider = "xcompute"
model_reasoning_effort = "high"
[profiles.deepseek]
model = "deepseek-v3.2"
model_provider = "xcompute-cn"
model_reasoning_effort = "medium"
[model_providers.xcompute]
name = "Xcompute API"
base_url = "https://xcompute.us/v1"
env_key = "OPENAI_API_KEY"
wire_api = "chat"
```
## 进阶:AGENTS.md 项目记忆
在项目根目录创建 `AGENTS.md`,为 Codex 提供持久化上下文:
```markdown theme={null}
# 项目规范
- 使用 TypeScript + React 开发
- 所有输出使用中文
- 测试框架使用 Jest
```
在 Codex 对话中使用 `/init` 可自动生成此文件。
## 成本控制建议
| 策略 | 说明 |
| ------------------- | ------------------------------- |
| 轻量任务用 gpt-5.6-luna | GPT 渠道 1.5 折,\$0.09/\$0.54 极低成本 |
| 日常编码用 gpt-5.6-terra | default,\$0.225/\$1.35 性价比之选 |
| 复杂任务用 gpt-5.6-sol | GPT 福利 0.9 折,\$0.45/\$2.70 高能力 |
| 简单任务用国产模型 | 5 折,成本低速度快 |
| 调低 reasoning effort | `medium` 或 `low` 减少 Token |
| 及时退出会话 | 避免空闲隐性消耗 |
***
## 相关资源
* **Codex 官方文档**:[https://platform.openai.com/codex](https://platform.openai.com/codex)
* **CC Switch 配置教程**:[https://api.xcompute.us/cc-switch](/cc-switch)
* **Xcompute API 文档**:[https://api.xcompute.us](/file)
* **Node.js 下载**:[https://nodejs.org/en](https://nodejs.org/en)
## 更多教程
* [CC Switch 对接 Xcompute API 教程](/cc-switch)
* [Codex++ 对接 Xcompute API 教程](/codex-plus-plus)
* [CodexHub 对接 Xcompute API 教程](/codexhub)
* [Codex 破甲指南](/codex-jailbreak)
* [移动端使用 Claude、Codex — Kelivo](/kelivo)
***
*最后更新:2026-07-13*
> 本内容由 Coze AI 生成,请遵循相关法律法规及《人工智能生成合成内容标识办法》使用与传播。