> ## Documentation Index
> Fetch the complete documentation index at: https://api.xcompute.us/llms.txt
> Use this file to discover all available pages before exploring further.
# CodexHub 对接 Xcompute API 教程
> CodexHub 是一款支持远程和本地同屏操作的 Codex 管理工具,内置 AI Gateway,可以接入多种模型渠道。本教程将指导你通过 CodexHub 接入 Xcompute API 中转站。
 ## 目录
1. [工具简介](#工具简介)
2. [前置准备](#前置准备)
3. [安装 CodexHub](#安装-codexhub)
4. [获取 Xcompute API Key](#获取-xcompute-api-key)
5. [配置 AI Gateway](#配置-ai-gateway)
6. [写入 Codex 配置](#写入-codex-配置)
7. [IM 通道接入(可选)](#im-通道接入可选)
8. [开始使用](#开始使用)
9. [常见问题](#常见问题)
***
## 工具简介
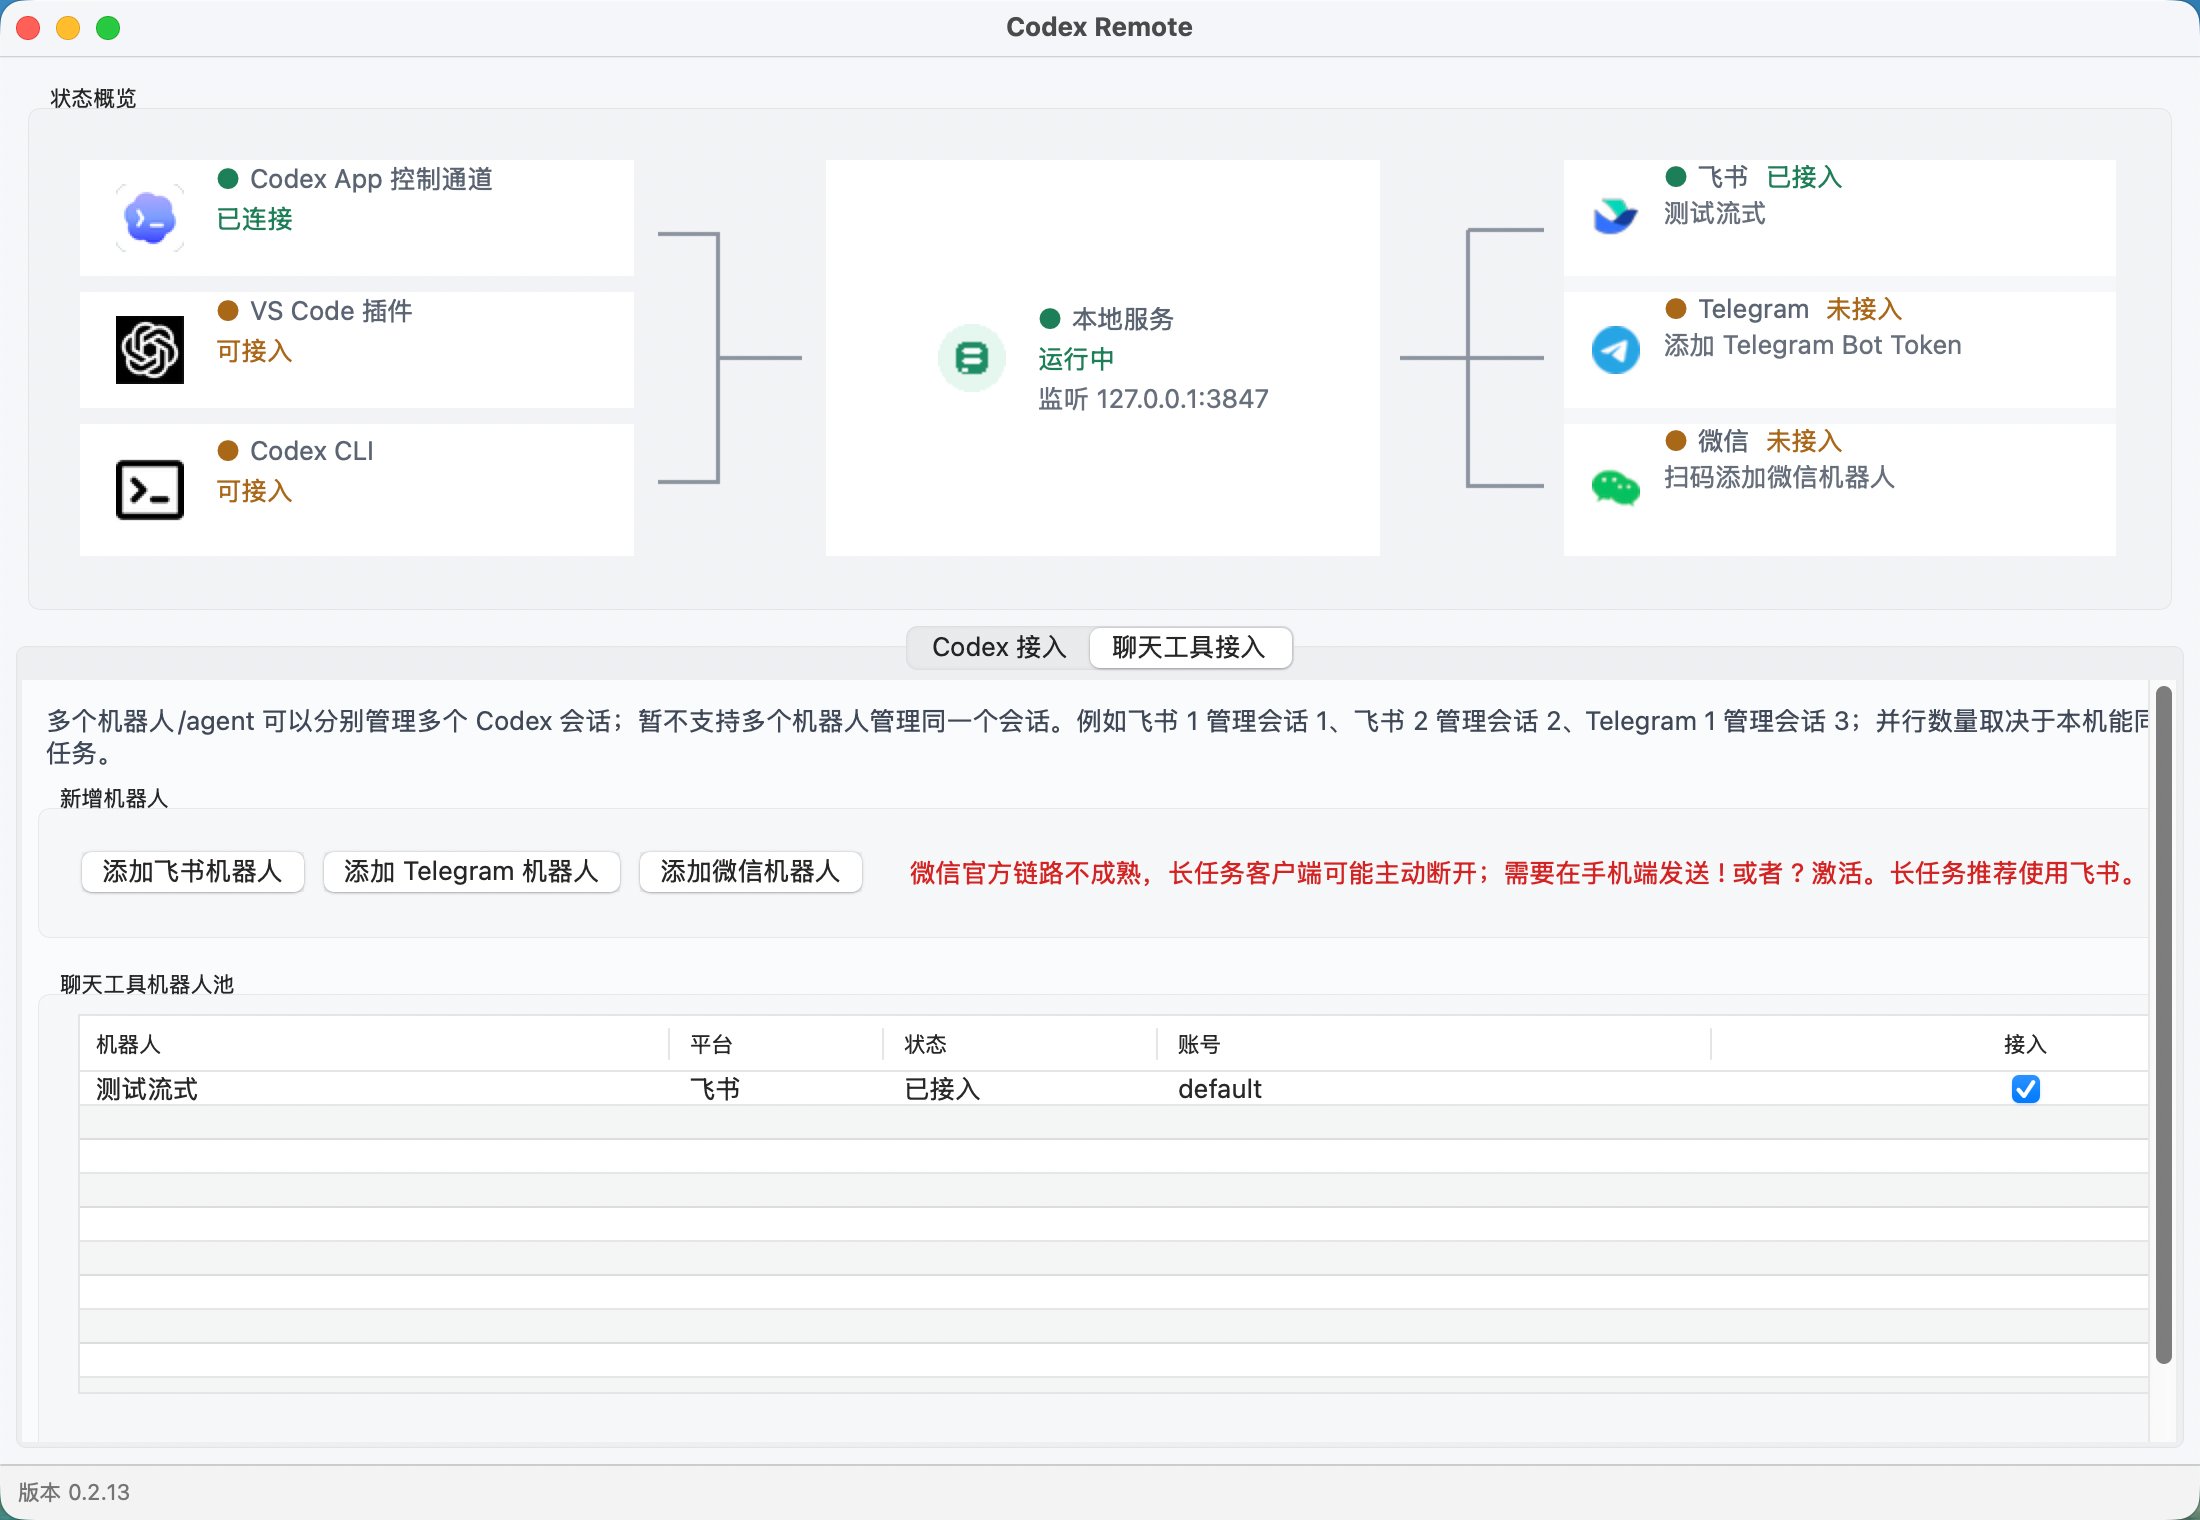
CodexHub 通过本地 backend 连接 Codex App、Codex VS Code 插件和 Codex CLI,不修改 Codex 前端代码或原始可执行文件。
* **内置 AI Gateway**:接入 OpenAI Responses、Chat Completions、Anthropic Messages 和智谱 GLM 等渠道
* **远程控制**:通过飞书、微信或 Telegram 远程操作本地 Codex
* **会话管理**:在 GUI 中管理历史会话并迁移到当前入口
* **协议转换**:在 Codex 原生 Responses 入口和不同上游协议之间转换
* **同屏操作**:同一个 Codex 会话可以在 IM 和本地客户端之间同步
**项目地址**:[https://github.com/happy-loki/codexhub](https://github.com/happy-loki/codexhub)
| 功能 | 说明 |
| ----------- | ----------------------------------- |
| 远程和本地同屏 | IM 与 Codex App、VS Code 插件或 CLI 共享会话 |
| 本地 Codex 接入 | 通过本地 backend 连接,不替换 Codex |
| 会话管理 | 管理历史会话,并将旧会话移动到当前入口 |
| IM 会话管理 | 在 IM 中创建、恢复会话并处理审批 |
| AI Gateway | 将 Codex 请求转发到 Xcompute 等模型渠道 |
### 架构全景
```
Codex App / VS Code / CLI
│
▼
CodexHub Backend (127.0.0.1:3847)
│
┌────┴────┐
│ │
AI Gateway IM Bridge
│ │
▼ ▼
Xcompute 飞书/微信/Telegram
(模型服务) (远程控制)
```
***
## 前置准备
* 已安装 Codex App、Codex VS Code 插件或 Codex CLI
* 已注册 [Xcompute 账号](https://xcompute.us)
* 使用 macOS、Windows 或 Linux
* 仅在需要远程控制时准备飞书、微信或 Telegram
CodexHub 接入 AI Gateway 不要求 ChatGPT 账号。Codex remote-control 的账号检查由本地兼容认证处理。
***
## 安装 CodexHub
从 [CodexHub Releases](https://github.com/happy-loki/codexhub/releases/latest) 下载对应安装包:
| 系统 | 安装包 |
| ------- | ------------------------------------------ |
| macOS | `CodexHub-*-macos-universal.dmg` |
| Windows | `CodexHub-*-windows-x64.msi` 或 Windows ZIP |
| Linux | `CodexHub.Linux.x86_64.AppImage` |
### macOS
打开 DMG,将 CodexHub 拖入 Applications,然后按系统提示确认首次启动。
### Windows
运行 MSI 安装程序;使用 ZIP 时解压后运行 `codexhub.exe`。
### Linux
```bash theme={null}
chmod +x CodexHub.Linux.x86_64.AppImage
./CodexHub.Linux.x86_64.AppImage
```
CodexHub 不安装开机启动项,也不会自动常驻后台。GUI 打开时会启动本地 backend,退出时会关闭本次启动的 backend。
***
## 获取 Xcompute API Key
1. 登录 [Xcompute 控制台](https://xcompute.us)
2. 进入 [API 密钥页面](https://xcompute.us/keys)
3. 点击 **创建新密钥**
4. 根据模型选择渠道分组
5. 复制以 `sk-` 开头的 API Key
| 使用场景 | 建议渠道 |
| --------------- | -------------- |
| GPT 模型 | GPT 福利渠道 0.9 折 |
| Claude 日常使用 | Kiro 渠道 1.8 折 |
| Claude 高质量或蒸馏需求 | 官 Key 渠道 4.9 折 |
API Key、IM Token 和 Codex 认证信息都是敏感数据,请勿公开或提交到代码仓库。
***
## 配置 AI Gateway
打开 CodexHub,确认状态概览中的本地服务正常,然后进入 **Codex 接入** 页面。
### 添加 Xcompute 渠道
点击 **添加渠道**,根据模型协议填写配置:
| 模型类型 | 服务商类型 | Base URL |
| -------------------- | -------------------- | ------------------------ |
| GPT Responses | `OpenAI Responses` | `https://xcompute.us/v1` |
| GPT Chat Completions | `Chat Completions` | `https://xcompute.us/v1` |
| Claude | `Anthropic Messages` | `https://xcompute.us` |
国内访问国际站时,将域名替换为 `intl.dualseason.com`,路径保持不变。
OpenAI Responses 和 Chat Completions 使用带 `/v1` 的 Base URL;Anthropic Messages 使用不带 `/v1` 的 Base URL。
### 推荐渠道配置
**Xcompute GPT:**
| 字段 | 值 |
| -------- | ------------------------ |
| 渠道名称 | `Xcompute GPT` |
| 服务商类型 | `OpenAI Responses` |
| Base URL | `https://xcompute.us/v1` |
| API Key | Xcompute API Key |
**Xcompute Claude:**
| 字段 | 值 |
| -------- | --------------------- |
| 渠道名称 | `Xcompute Claude` |
| 服务商类型 | `Anthropic Messages` |
| Base URL | `https://xcompute.us` |
| API Key | Xcompute API Key |
### 添加模型
```text theme={null}
gpt-5.5
gpt-5.4
claude-fable-5
claude-sonnet-5
claude-opus-4-8
```
如果上游模型名与 Codex 显示名不同,可以使用 **编辑模型映射** 创建别名。渠道不支持生图工具时,启用 **过滤生图工具**,Gateway 会移除 `image_generation` 请求。
保存渠道后,可以在请求日志中查看原始请求、上游请求、返回结果、错误、Token、缓存和耗时。
## 目录
1. [工具简介](#工具简介)
2. [前置准备](#前置准备)
3. [安装 CodexHub](#安装-codexhub)
4. [获取 Xcompute API Key](#获取-xcompute-api-key)
5. [配置 AI Gateway](#配置-ai-gateway)
6. [写入 Codex 配置](#写入-codex-配置)
7. [IM 通道接入(可选)](#im-通道接入可选)
8. [开始使用](#开始使用)
9. [常见问题](#常见问题)
***
## 工具简介
CodexHub 通过本地 backend 连接 Codex App、Codex VS Code 插件和 Codex CLI,不修改 Codex 前端代码或原始可执行文件。
* **内置 AI Gateway**:接入 OpenAI Responses、Chat Completions、Anthropic Messages 和智谱 GLM 等渠道
* **远程控制**:通过飞书、微信或 Telegram 远程操作本地 Codex
* **会话管理**:在 GUI 中管理历史会话并迁移到当前入口
* **协议转换**:在 Codex 原生 Responses 入口和不同上游协议之间转换
* **同屏操作**:同一个 Codex 会话可以在 IM 和本地客户端之间同步
**项目地址**:[https://github.com/happy-loki/codexhub](https://github.com/happy-loki/codexhub)
| 功能 | 说明 |
| ----------- | ----------------------------------- |
| 远程和本地同屏 | IM 与 Codex App、VS Code 插件或 CLI 共享会话 |
| 本地 Codex 接入 | 通过本地 backend 连接,不替换 Codex |
| 会话管理 | 管理历史会话,并将旧会话移动到当前入口 |
| IM 会话管理 | 在 IM 中创建、恢复会话并处理审批 |
| AI Gateway | 将 Codex 请求转发到 Xcompute 等模型渠道 |
### 架构全景
```
Codex App / VS Code / CLI
│
▼
CodexHub Backend (127.0.0.1:3847)
│
┌────┴────┐
│ │
AI Gateway IM Bridge
│ │
▼ ▼
Xcompute 飞书/微信/Telegram
(模型服务) (远程控制)
```
***
## 前置准备
* 已安装 Codex App、Codex VS Code 插件或 Codex CLI
* 已注册 [Xcompute 账号](https://xcompute.us)
* 使用 macOS、Windows 或 Linux
* 仅在需要远程控制时准备飞书、微信或 Telegram
CodexHub 接入 AI Gateway 不要求 ChatGPT 账号。Codex remote-control 的账号检查由本地兼容认证处理。
***
## 安装 CodexHub
从 [CodexHub Releases](https://github.com/happy-loki/codexhub/releases/latest) 下载对应安装包:
| 系统 | 安装包 |
| ------- | ------------------------------------------ |
| macOS | `CodexHub-*-macos-universal.dmg` |
| Windows | `CodexHub-*-windows-x64.msi` 或 Windows ZIP |
| Linux | `CodexHub.Linux.x86_64.AppImage` |
### macOS
打开 DMG,将 CodexHub 拖入 Applications,然后按系统提示确认首次启动。
### Windows
运行 MSI 安装程序;使用 ZIP 时解压后运行 `codexhub.exe`。
### Linux
```bash theme={null}
chmod +x CodexHub.Linux.x86_64.AppImage
./CodexHub.Linux.x86_64.AppImage
```
CodexHub 不安装开机启动项,也不会自动常驻后台。GUI 打开时会启动本地 backend,退出时会关闭本次启动的 backend。
***
## 获取 Xcompute API Key
1. 登录 [Xcompute 控制台](https://xcompute.us)
2. 进入 [API 密钥页面](https://xcompute.us/keys)
3. 点击 **创建新密钥**
4. 根据模型选择渠道分组
5. 复制以 `sk-` 开头的 API Key
| 使用场景 | 建议渠道 |
| --------------- | -------------- |
| GPT 模型 | GPT 福利渠道 0.9 折 |
| Claude 日常使用 | Kiro 渠道 1.8 折 |
| Claude 高质量或蒸馏需求 | 官 Key 渠道 4.9 折 |
API Key、IM Token 和 Codex 认证信息都是敏感数据,请勿公开或提交到代码仓库。
***
## 配置 AI Gateway
打开 CodexHub,确认状态概览中的本地服务正常,然后进入 **Codex 接入** 页面。
### 添加 Xcompute 渠道
点击 **添加渠道**,根据模型协议填写配置:
| 模型类型 | 服务商类型 | Base URL |
| -------------------- | -------------------- | ------------------------ |
| GPT Responses | `OpenAI Responses` | `https://xcompute.us/v1` |
| GPT Chat Completions | `Chat Completions` | `https://xcompute.us/v1` |
| Claude | `Anthropic Messages` | `https://xcompute.us` |
国内访问国际站时,将域名替换为 `intl.dualseason.com`,路径保持不变。
OpenAI Responses 和 Chat Completions 使用带 `/v1` 的 Base URL;Anthropic Messages 使用不带 `/v1` 的 Base URL。
### 推荐渠道配置
**Xcompute GPT:**
| 字段 | 值 |
| -------- | ------------------------ |
| 渠道名称 | `Xcompute GPT` |
| 服务商类型 | `OpenAI Responses` |
| Base URL | `https://xcompute.us/v1` |
| API Key | Xcompute API Key |
**Xcompute Claude:**
| 字段 | 值 |
| -------- | --------------------- |
| 渠道名称 | `Xcompute Claude` |
| 服务商类型 | `Anthropic Messages` |
| Base URL | `https://xcompute.us` |
| API Key | Xcompute API Key |
### 添加模型
```text theme={null}
gpt-5.5
gpt-5.4
claude-fable-5
claude-sonnet-5
claude-opus-4-8
```
如果上游模型名与 Codex 显示名不同,可以使用 **编辑模型映射** 创建别名。渠道不支持生图工具时,启用 **过滤生图工具**,Gateway 会移除 `image_generation` 请求。
保存渠道后,可以在请求日志中查看原始请求、上游请求、返回结果、错误、Token、缓存和耗时。
 ***
## 写入 Codex 配置
1. 在 **Codex 接入** 页面点击 **写入 Codex 配置**
2. CodexHub 将 `chatgpt_base_url` 指向本地 Gateway
3. 重启 Codex App 或 VS Code 插件
写入后的本地地址为:
```text theme={null}
http://127.0.0.1:3847/backend-api
```
点击 **恢复 Codex 原有配置** 可以恢复写入前的连接方式。该操作不会卸载 Codex,也不会删除会话历史。
***
## IM 通道接入(可选)
只有需要远程控制时才需要配置 IM。
### 飞书
进入 **聊天工具接入**,选择飞书并点击 **扫码使用新机器人**,按二维码流程完成接入。
### Telegram
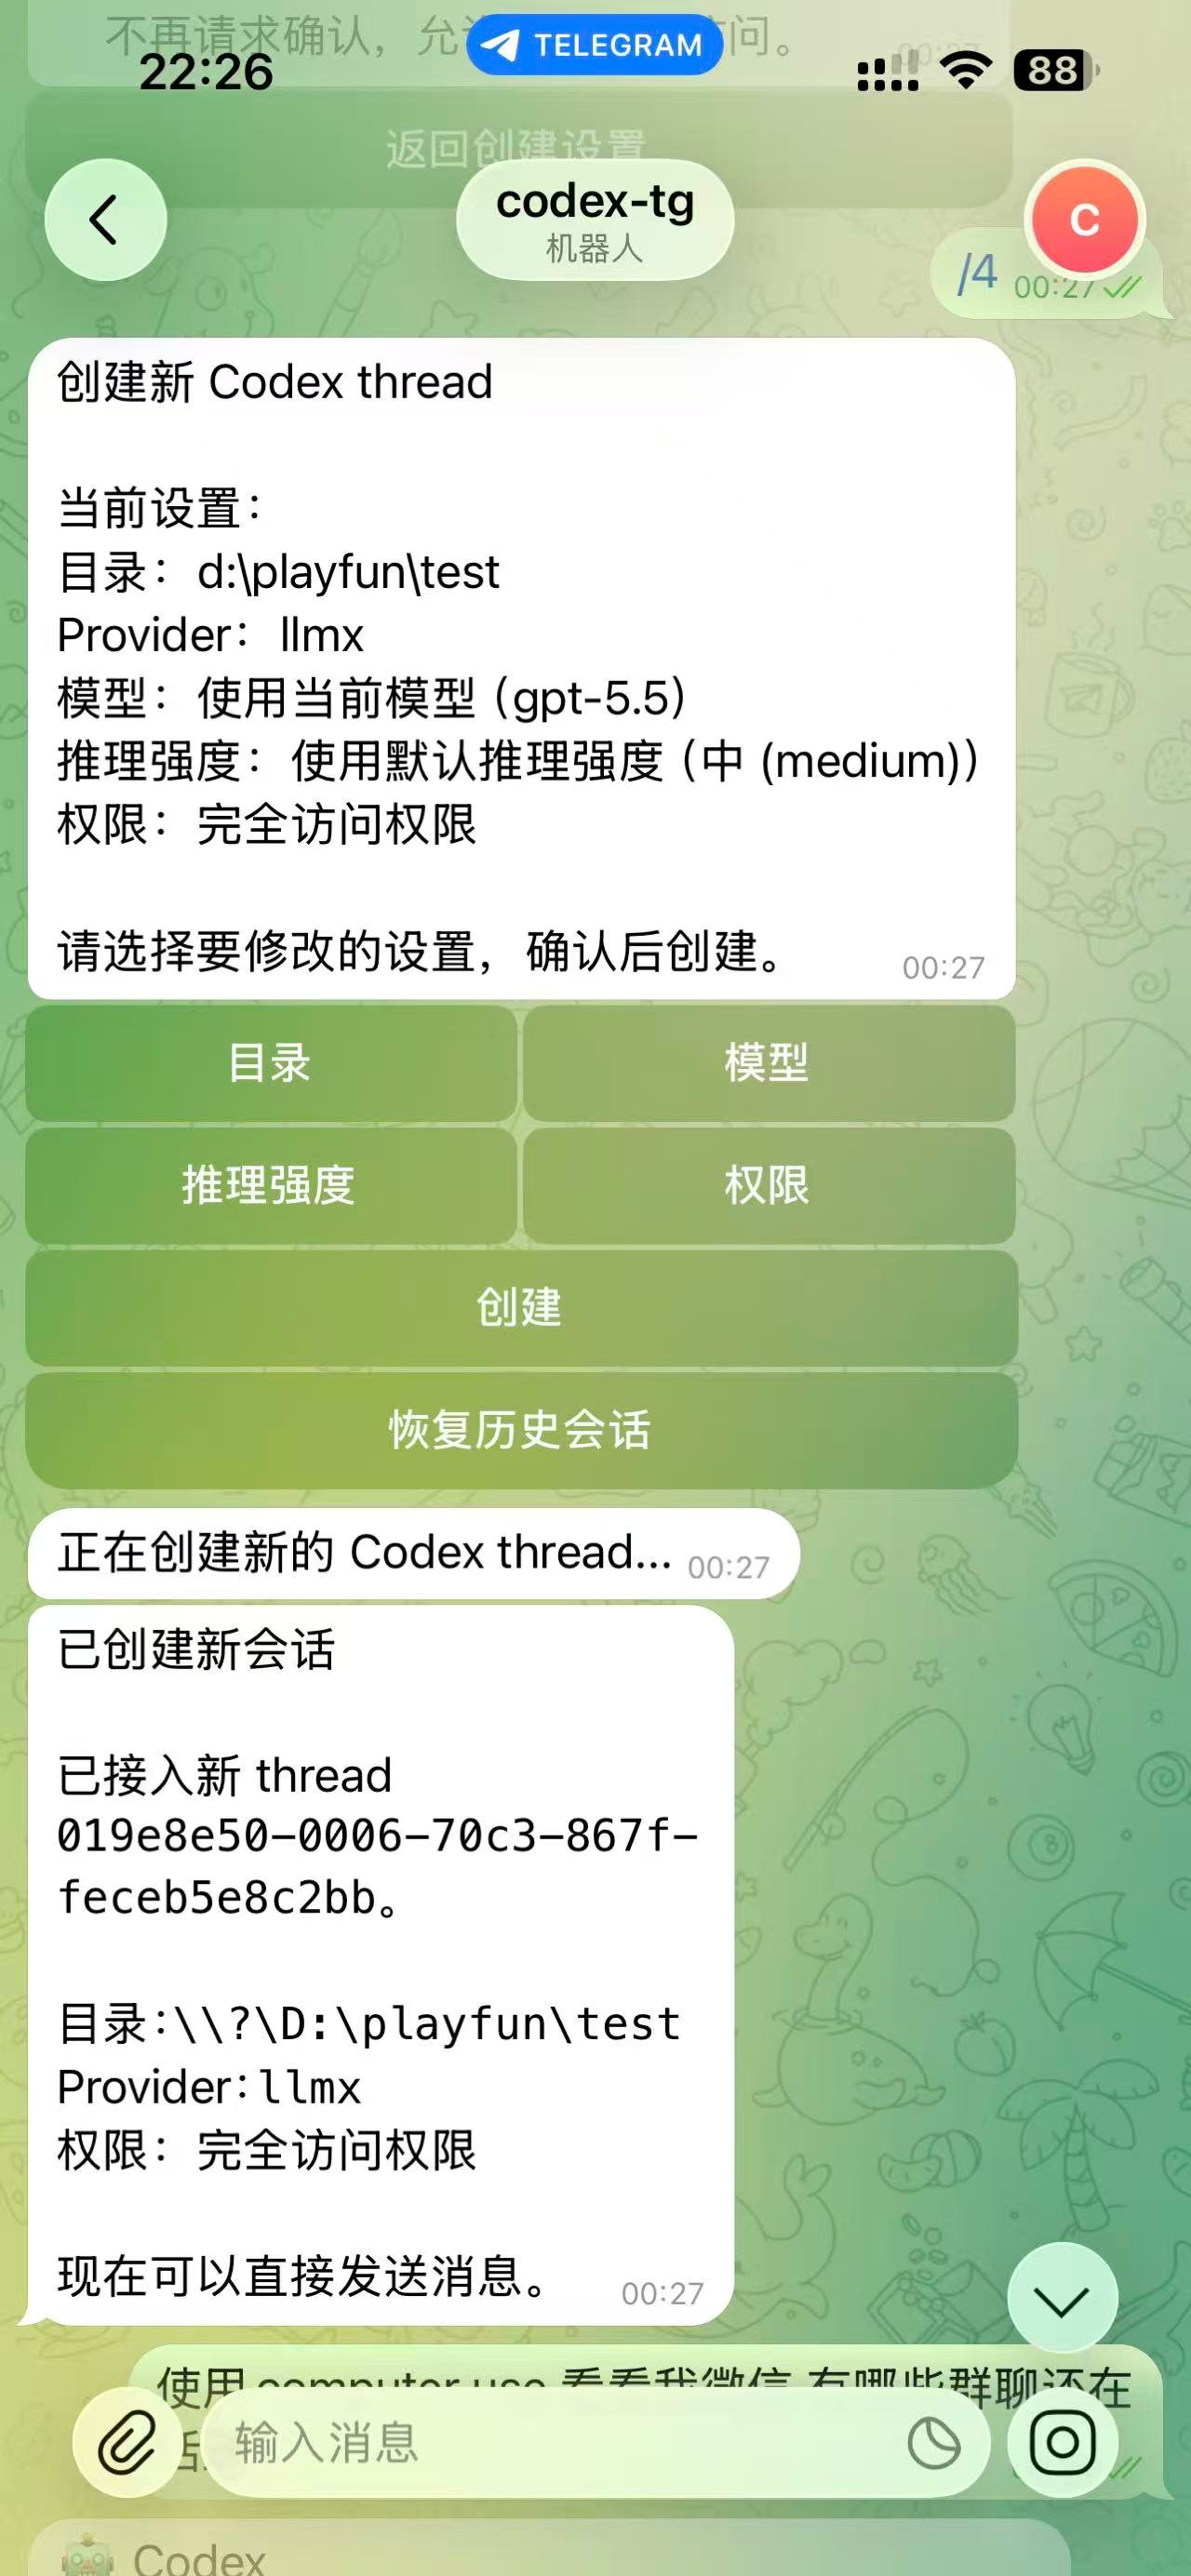
填写 BotFather 提供的 Bot Token,然后点击 **保存并接入**。当前只支持机器人私聊,不接入群聊。
***
## 写入 Codex 配置
1. 在 **Codex 接入** 页面点击 **写入 Codex 配置**
2. CodexHub 将 `chatgpt_base_url` 指向本地 Gateway
3. 重启 Codex App 或 VS Code 插件
写入后的本地地址为:
```text theme={null}
http://127.0.0.1:3847/backend-api
```
点击 **恢复 Codex 原有配置** 可以恢复写入前的连接方式。该操作不会卸载 Codex,也不会删除会话历史。
***
## IM 通道接入(可选)
只有需要远程控制时才需要配置 IM。
### 飞书
进入 **聊天工具接入**,选择飞书并点击 **扫码使用新机器人**,按二维码流程完成接入。
### Telegram
填写 BotFather 提供的 Bot Token,然后点击 **保存并接入**。当前只支持机器人私聊,不接入群聊。
 ### 微信
选择微信并扫码确认。长任务或手机端长时间不活动导致 Token 过期时,在微信发送 `!` 或 `?` 刷新发送链路,这两个消息不会转发给 Codex。
***
## 开始使用
### Codex App 或 VS Code 插件
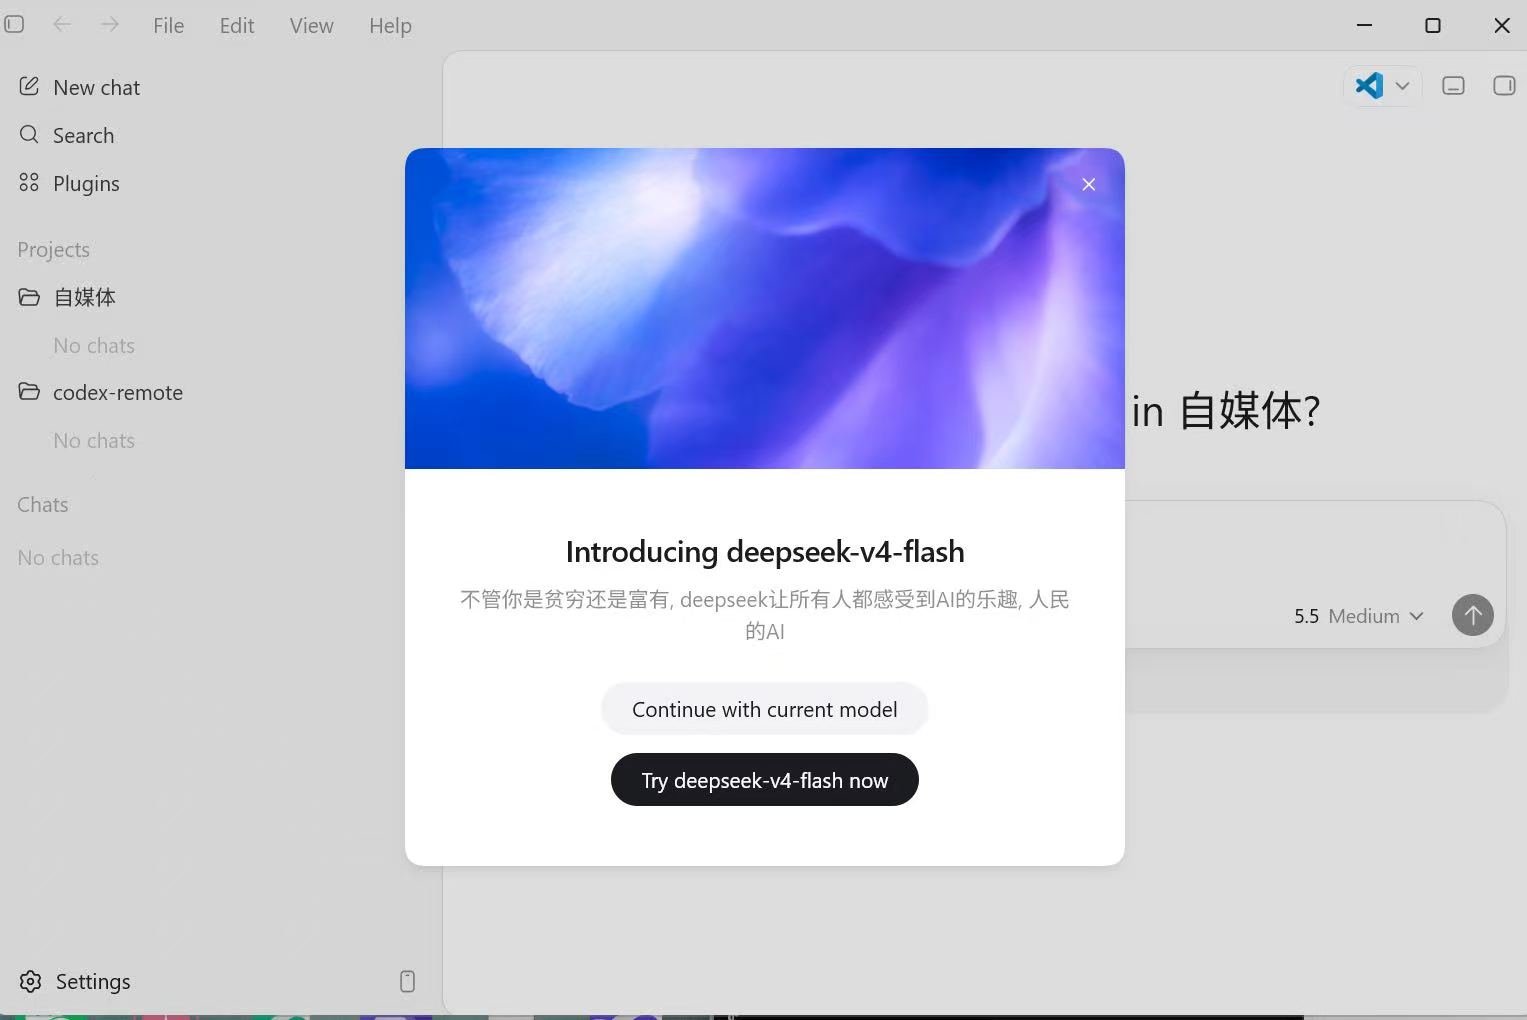
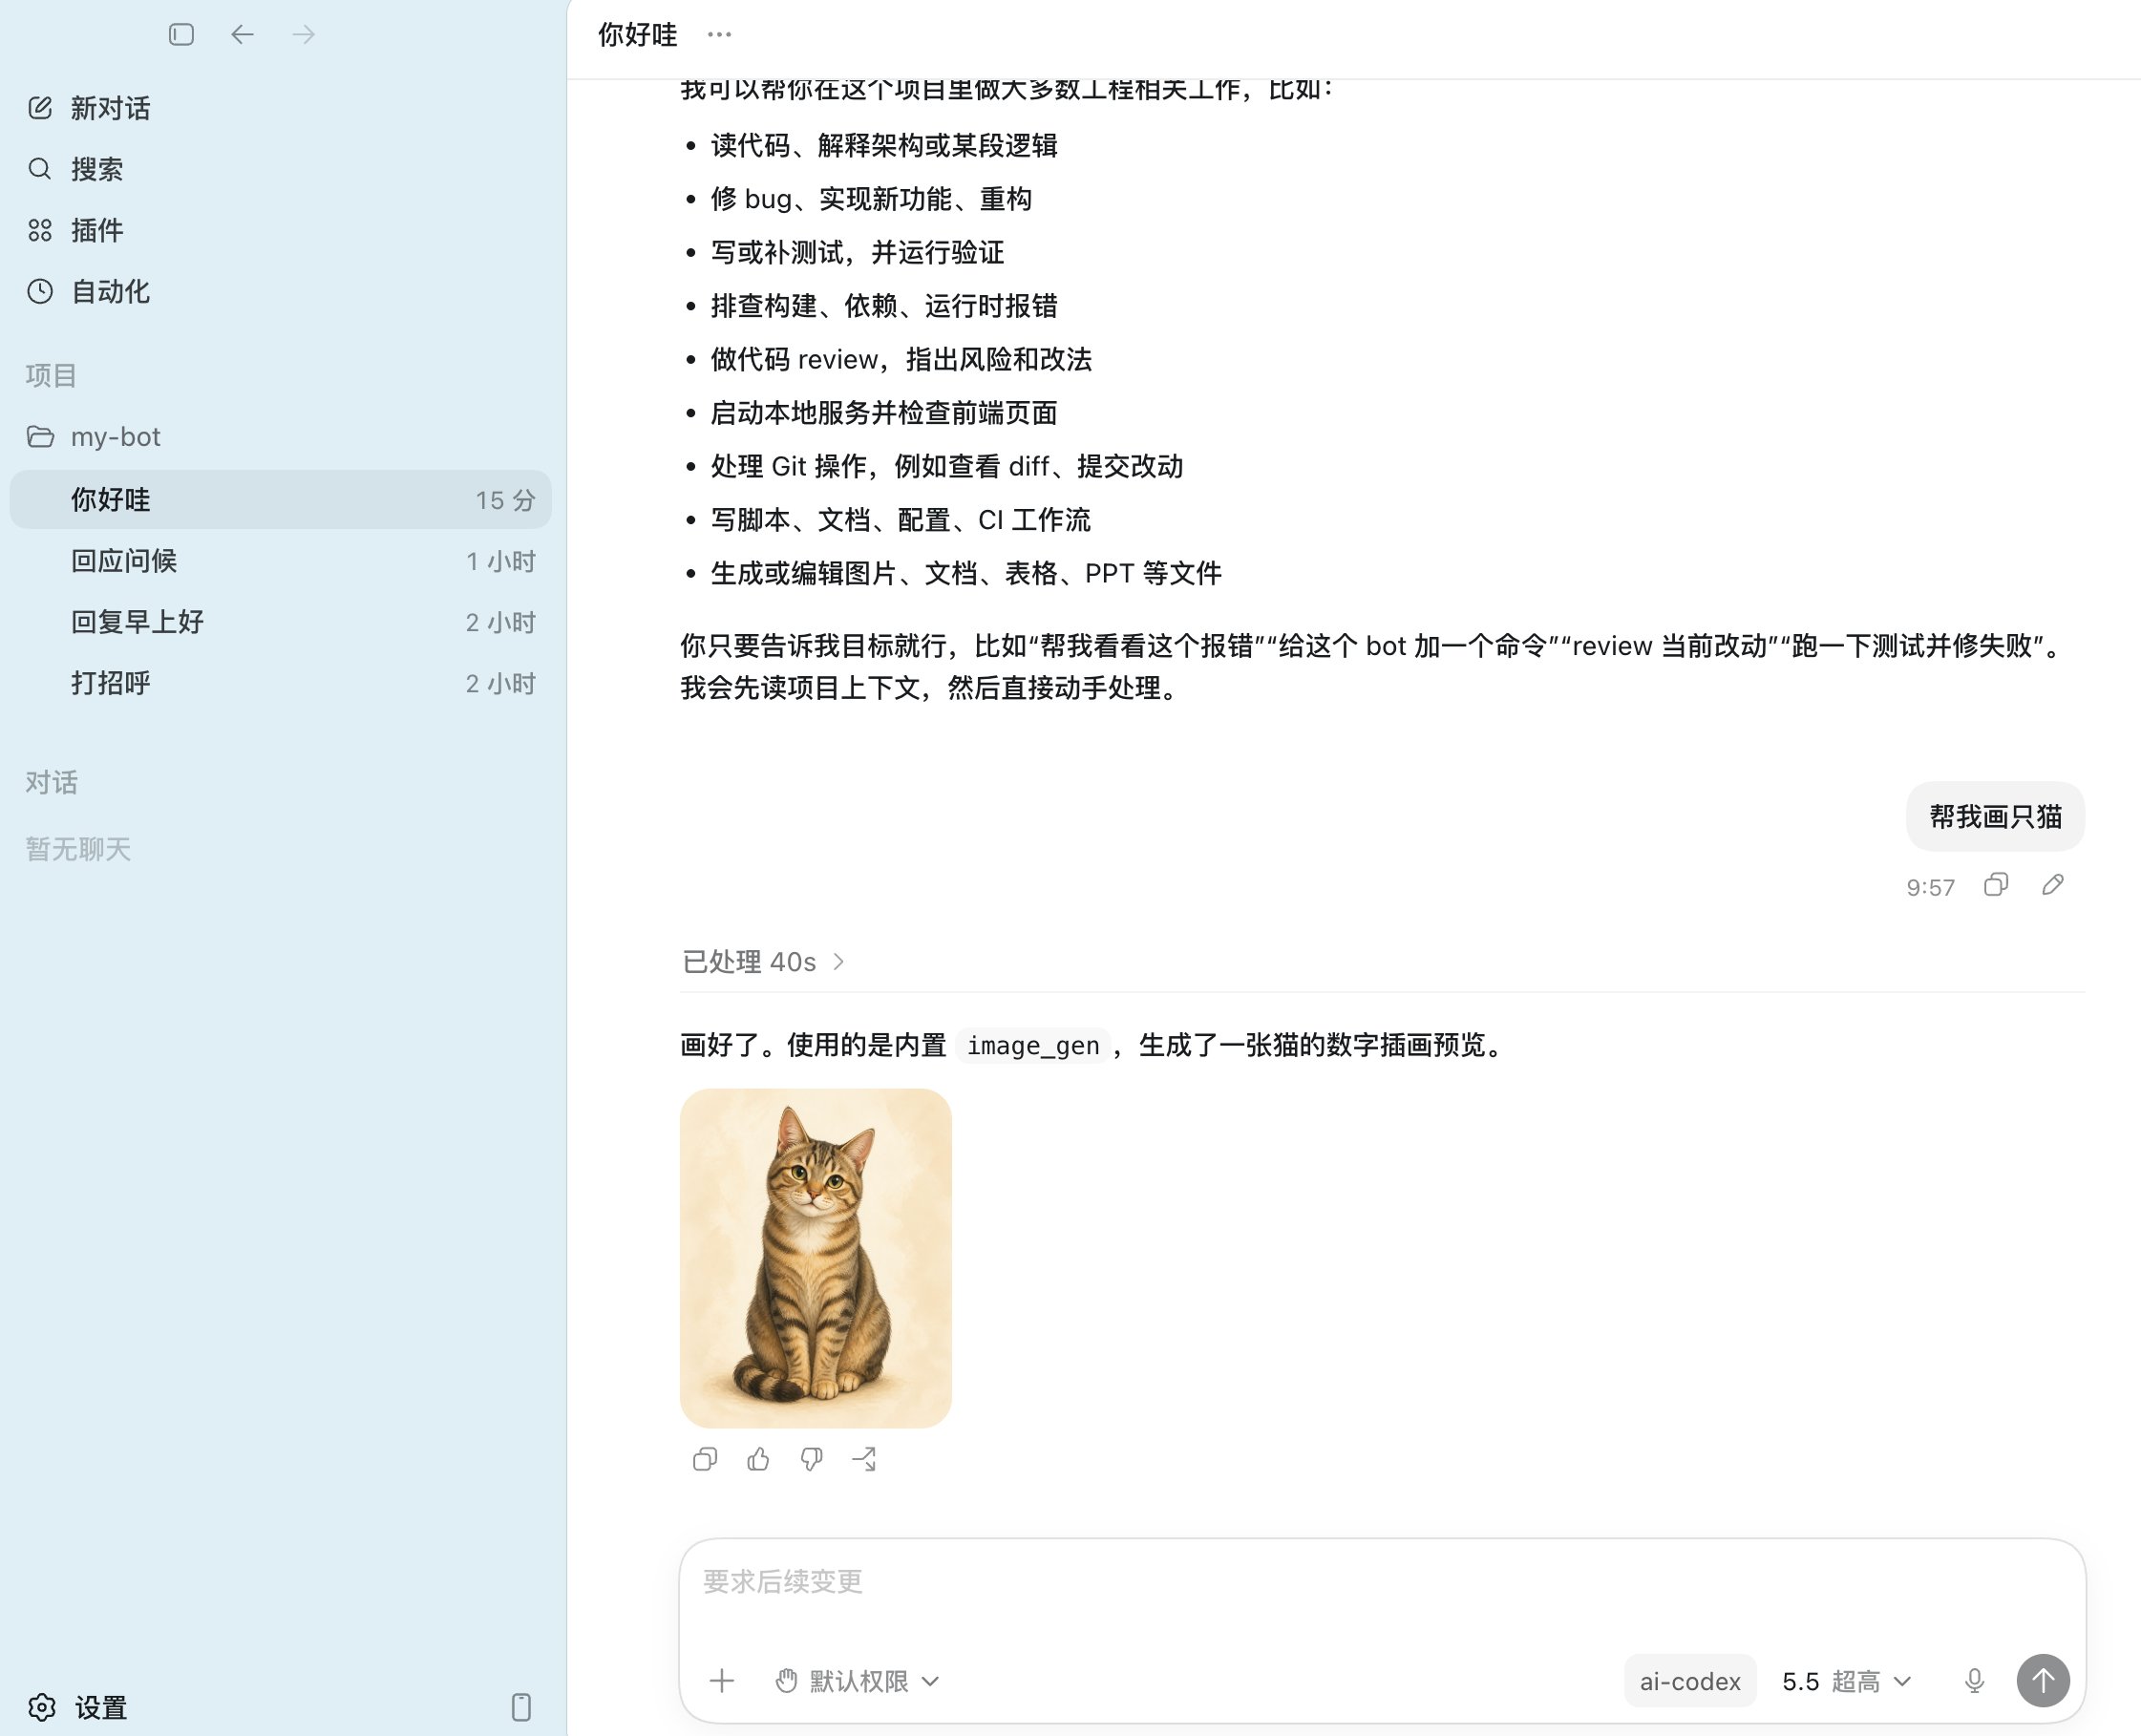
正常启动 Codex App 或 VS Code 插件,并打开 **remote-control / 控制这台电脑**。连接成功后,CodexHub 中的控制通道会显示为已连接。
### 微信
选择微信并扫码确认。长任务或手机端长时间不活动导致 Token 过期时,在微信发送 `!` 或 `?` 刷新发送链路,这两个消息不会转发给 Codex。
***
## 开始使用
### Codex App 或 VS Code 插件
正常启动 Codex App 或 VS Code 插件,并打开 **remote-control / 控制这台电脑**。连接成功后,CodexHub 中的控制通道会显示为已连接。
 ### Codex CLI
在项目目录启动 Codex app-server:
```bash theme={null}
codex app-server --listen ws://127.0.0.1:3849 --remote-control
```
再打开一个终端连接本地 Codex TUI:
```bash theme={null}
codex --remote ws://127.0.0.1:3849
```
端口被占用时可以更换,但两个命令中的地址必须一致。
### IM 会话
在飞书、Telegram 私聊或微信中给机器人发消息。未绑定 Codex Thread 时,机器人会提示新建或恢复会话。
如果多个执行端同时连接,新会话按以下优先级选择:
```text theme={null}
Codex App > Codex VS Code 插件 > Codex CLI
```
***
## 网络与代理
| 模式 | 说明 |
| --------------- | -------- |
| 跟随系统代理 | 使用系统代理配置 |
| 强制直连 | 不使用代理 |
| 自定义 HTTP/SOCKS5 | 手动填写代理地址 |
示例:`http://127.0.0.1:7890` 或 `socks5://127.0.0.1:1080`。
该设置只影响 CodexHub 访问模型服务、IM API 和更新地址,不修改系统代理。VPN 拦截回环流量时,应排除 `localhost`、`127.0.0.1` 和 `::1`。
***
## 常见问题
### Codex 连接失败怎么办?
1. 确认 CodexHub 本地 backend 正常运行
2. 确认已经写入 Codex 配置
3. 重启 Codex App 或 VS Code 插件
4. 检查 Xcompute Base URL、API Key 和模型协议
5. 查看 CodexHub 请求日志
### 如何切换模型?
在 AI Gateway 中调整默认模型,或者在 Codex App 中选择 Codex 可见模型。请求会路由到对应渠道。
### IM 通道连接失败怎么办?
* 飞书:检查扫码状态和机器人权限
* Telegram:确认 Bot Token 正确且使用私聊
* 微信:重新扫码,或发送 `!` / `?` 刷新 Token
### 如何恢复原有配置?
点击 **恢复 Codex 原有配置**,然后重启 Codex。
### 如何迁移会话?
在 **会话管理** 中选择旧会话并点击 **移动到当前入口**,之后可继续在 Codex App 左侧访问。
### IM 中如何清除当前绑定?
```text theme={null}
/q
```
***
## 安全说明
* daemon 默认只绑定 `127.0.0.1`,不要直接暴露到公网
* 建议配置 `allowedOpenIds` 和 `allowedChatIds`
* IM 用户可以向 Codex 提交审批决定,IM 访问权限等同于本地 Codex 审批权限
* 飞书附件会下载到状态目录旁的 `.im/attachments/feishu/`
### 项目边界
CodexHub 不会安装 `codex` 包装命令、替换 Codex CLI、通过 shim 启动 Codex App、安装开机启动项或替换原始可执行文件。
***
## 状态接口
```text theme={null}
GET http://127.0.0.1:3847/api/status
GET http://127.0.0.1:3847/api/remote-control/status
GET http://127.0.0.1:3847/api/remote-control/backend-status
GET http://127.0.0.1:3847/api/events
```
***
## 更多教程
* [CC Switch 对接 Xcompute API 教程](/cc-switch)
* [Codex++ 对接 Xcompute API 教程](/codex-plus-plus)
* [Codex 的安装与配置](/codex-install)
* [移动端使用 Claude、Codex — Kelivo](/kelivo)
* [Codex 破甲指南](/codex-jailbreak)
***
## 相关资源
* **CodexHub GitHub**:[https://github.com/happy-loki/codexhub](https://github.com/happy-loki/codexhub)
* **CodexHub Releases**:[https://github.com/happy-loki/codexhub/releases](https://github.com/happy-loki/codexhub/releases)
* **Xcompute API 文档**:[https://api.xcompute.us](https://api.xcompute.us)
* **架构说明**:[CodexHub Architecture](https://github.com/happy-loki/codexhub/blob/main/docs/architecture.md)
* **排障文档**:[Troubleshooting](https://github.com/happy-loki/codexhub/blob/main/docs/troubleshooting.md)
* **认证说明**:[Auth Notes](https://github.com/happy-loki/codexhub/blob/main/docs/auth-notes.zh-CN.md)
***
## 附录:Xcompute 渠道 TOML 配置参考
以下是一份完整的 AI Gateway TOML 配置,可直接参考使用:
```toml theme={null}
[aiGateway]
enabled = true
routePrefix = "/ai-gateway/v1"
# Xcompute GPT 渠道(OpenAI 协议)
[[aiGateway.providers]]
name = "xcompute-gpt"
enabled = true
kind = "openai_responses"
baseUrl = "https://xcompute.us/v1"
apiKey = "sk-xc-your-api-key"
models = ["gpt-5.5", "gpt-5.4"]
# Xcompute Claude 渠道(Anthropic 协议)
[[aiGateway.providers]]
name = "xcompute-claude"
enabled = true
kind = "anthropic_messages"
baseUrl = "https://xcompute.us"
apiKey = "sk-xc-your-api-key"
models = ["claude-fable-5", "claude-sonnet-5"]
# Xcompute 加速渠道(可选)
[[aiGateway.providers]]
name = "xcompute-accelerated"
enabled = true
kind = "openai_responses"
baseUrl = "https://intl.dualseason.com/v1"
apiKey = "sk-xc-your-api-key"
models = ["gpt-5.5"]
# 模型映射示例
[aiGateway.modelMapping]
"claude-sonnet-5" = ["claude-sonnet-5"]
```
⚠️ 请将 `apiKey` 替换为你的真实密钥,不要提交到 Git。
***
*最后更新:2026-07-13*
> 本内容由 Coze AI 生成,请遵循相关法律法规及《人工智能生成合成内容标识办法》使用与传播。
### Codex CLI
在项目目录启动 Codex app-server:
```bash theme={null}
codex app-server --listen ws://127.0.0.1:3849 --remote-control
```
再打开一个终端连接本地 Codex TUI:
```bash theme={null}
codex --remote ws://127.0.0.1:3849
```
端口被占用时可以更换,但两个命令中的地址必须一致。
### IM 会话
在飞书、Telegram 私聊或微信中给机器人发消息。未绑定 Codex Thread 时,机器人会提示新建或恢复会话。
如果多个执行端同时连接,新会话按以下优先级选择:
```text theme={null}
Codex App > Codex VS Code 插件 > Codex CLI
```
***
## 网络与代理
| 模式 | 说明 |
| --------------- | -------- |
| 跟随系统代理 | 使用系统代理配置 |
| 强制直连 | 不使用代理 |
| 自定义 HTTP/SOCKS5 | 手动填写代理地址 |
示例:`http://127.0.0.1:7890` 或 `socks5://127.0.0.1:1080`。
该设置只影响 CodexHub 访问模型服务、IM API 和更新地址,不修改系统代理。VPN 拦截回环流量时,应排除 `localhost`、`127.0.0.1` 和 `::1`。
***
## 常见问题
### Codex 连接失败怎么办?
1. 确认 CodexHub 本地 backend 正常运行
2. 确认已经写入 Codex 配置
3. 重启 Codex App 或 VS Code 插件
4. 检查 Xcompute Base URL、API Key 和模型协议
5. 查看 CodexHub 请求日志
### 如何切换模型?
在 AI Gateway 中调整默认模型,或者在 Codex App 中选择 Codex 可见模型。请求会路由到对应渠道。
### IM 通道连接失败怎么办?
* 飞书:检查扫码状态和机器人权限
* Telegram:确认 Bot Token 正确且使用私聊
* 微信:重新扫码,或发送 `!` / `?` 刷新 Token
### 如何恢复原有配置?
点击 **恢复 Codex 原有配置**,然后重启 Codex。
### 如何迁移会话?
在 **会话管理** 中选择旧会话并点击 **移动到当前入口**,之后可继续在 Codex App 左侧访问。
### IM 中如何清除当前绑定?
```text theme={null}
/q
```
***
## 安全说明
* daemon 默认只绑定 `127.0.0.1`,不要直接暴露到公网
* 建议配置 `allowedOpenIds` 和 `allowedChatIds`
* IM 用户可以向 Codex 提交审批决定,IM 访问权限等同于本地 Codex 审批权限
* 飞书附件会下载到状态目录旁的 `.im/attachments/feishu/`
### 项目边界
CodexHub 不会安装 `codex` 包装命令、替换 Codex CLI、通过 shim 启动 Codex App、安装开机启动项或替换原始可执行文件。
***
## 状态接口
```text theme={null}
GET http://127.0.0.1:3847/api/status
GET http://127.0.0.1:3847/api/remote-control/status
GET http://127.0.0.1:3847/api/remote-control/backend-status
GET http://127.0.0.1:3847/api/events
```
***
## 更多教程
* [CC Switch 对接 Xcompute API 教程](/cc-switch)
* [Codex++ 对接 Xcompute API 教程](/codex-plus-plus)
* [Codex 的安装与配置](/codex-install)
* [移动端使用 Claude、Codex — Kelivo](/kelivo)
* [Codex 破甲指南](/codex-jailbreak)
***
## 相关资源
* **CodexHub GitHub**:[https://github.com/happy-loki/codexhub](https://github.com/happy-loki/codexhub)
* **CodexHub Releases**:[https://github.com/happy-loki/codexhub/releases](https://github.com/happy-loki/codexhub/releases)
* **Xcompute API 文档**:[https://api.xcompute.us](https://api.xcompute.us)
* **架构说明**:[CodexHub Architecture](https://github.com/happy-loki/codexhub/blob/main/docs/architecture.md)
* **排障文档**:[Troubleshooting](https://github.com/happy-loki/codexhub/blob/main/docs/troubleshooting.md)
* **认证说明**:[Auth Notes](https://github.com/happy-loki/codexhub/blob/main/docs/auth-notes.zh-CN.md)
***
## 附录:Xcompute 渠道 TOML 配置参考
以下是一份完整的 AI Gateway TOML 配置,可直接参考使用:
```toml theme={null}
[aiGateway]
enabled = true
routePrefix = "/ai-gateway/v1"
# Xcompute GPT 渠道(OpenAI 协议)
[[aiGateway.providers]]
name = "xcompute-gpt"
enabled = true
kind = "openai_responses"
baseUrl = "https://xcompute.us/v1"
apiKey = "sk-xc-your-api-key"
models = ["gpt-5.5", "gpt-5.4"]
# Xcompute Claude 渠道(Anthropic 协议)
[[aiGateway.providers]]
name = "xcompute-claude"
enabled = true
kind = "anthropic_messages"
baseUrl = "https://xcompute.us"
apiKey = "sk-xc-your-api-key"
models = ["claude-fable-5", "claude-sonnet-5"]
# Xcompute 加速渠道(可选)
[[aiGateway.providers]]
name = "xcompute-accelerated"
enabled = true
kind = "openai_responses"
baseUrl = "https://intl.dualseason.com/v1"
apiKey = "sk-xc-your-api-key"
models = ["gpt-5.5"]
# 模型映射示例
[aiGateway.modelMapping]
"claude-sonnet-5" = ["claude-sonnet-5"]
```
⚠️ 请将 `apiKey` 替换为你的真实密钥,不要提交到 Git。
***
*最后更新:2026-07-13*
> 本内容由 Coze AI 生成,请遵循相关法律法规及《人工智能生成合成内容标识办法》使用与传播。